
Another quick recipe for those who dislike wasting ingredients. So many times, we talk ourselves out of doing projects in the kitchen because it creates waste, or we have no idea how to use whatever is left over. But there are SO many ways to make sure you use as much of your items as possible.
The last time I made French Macarons, I was also making homemade Pasta (Ravioli) so had an immediate need for the yolks I was separating out. This time… I was not and I was not happy that I might be putting farm fresh egg yolks down the drain. Our ladies work HARD to make us those eggs… it just seems rude to discard their efforts!
Enter the Cure: This is one of those little tricks, that helps you use ALL of the egg…. if you are making something that calls for egg whites, KEEP THOSE YOLKS! Recipe first, then the story….
Note: this has a little heat (but the spicy additions to this dry brine can be omitted with ease,) also has some bright notes (from the green cardamom) and some added umami (from the bonito.) Basically, this is a savory yolk dry brine for a yolk to use with pastas, pizza or salads. I would still grate it on a dessert for sure, if you enjoy a little salty with your sweet!
SALT Cured HERBY UMAMI Egg Yolk (use within 2-3 months)
Ingredients:
3-4 egg yolks
2 cups of coarse kosher salt (divided)
1 tbsp smoked salt (I used coarse Alderwood smoked Sea Salt)
1 1/2 cup of granulated sugar
1 cardamom pod (optional)
1 tbsp of peppercorns of choice (pink, black or if you like some heat as I do: sancho)
2 bay leaves
1 tsp red pepper flakes (optional)
2 tbsp bonito flakes (optional)
Instructions:
- Put 1/2 cup of kosher salt, smoked salt and remaining spices into food processor or spice grinder (I used a small spice grinder so worked in a few small batches) and grind semi-fine consistency
- Place spiced/herbed mix into medium bowl and add remaining salt and sugar. Mix well to combine
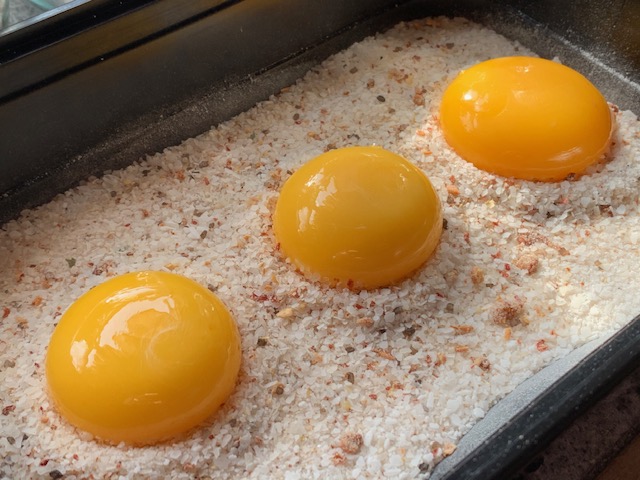
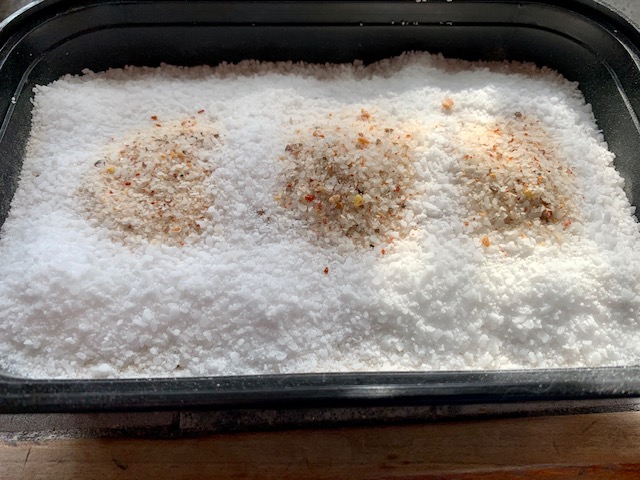
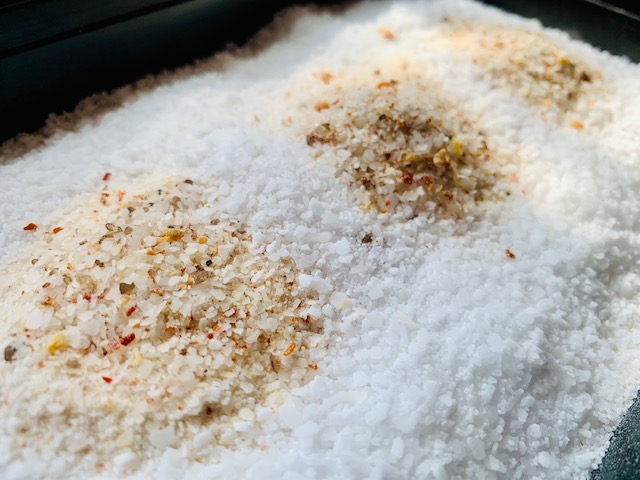
- Take a small flat container (one large enough to lie your yolks in, evenly with about an inch or two between them) and spread half of salt/sugar blend along the bottom. I used a medium sized to-go container that has a lid.
- Using a dry tablespoon measuring spoon, make small indentations in the top of the salt/sugar mixture. This is a little well for your yolks to sit in, so space them evenly. The goal is to make sure your yolks will be completely encased in salt on all sides.
- Crack your eggs, separating the white from the yolk in your hand. This is the best method (in my opinion) for making sure you don’t accidentally rupture a yolk. Do this step over a bowl to collect the whites (for another project perhaps *wink wink*) which also protects your dry brine in case a rupture does happen and your broken yolk contaminates your entire dry brine! EEK, no one wants that!
- One by one, gently place your yolks into their wells. Once in place, gently cover them all with the remaining salt/sugar mixture. If you find that your eggs are not fully submerged, you can add more kosher salt along the top. I use a small layer of kosher salt on top to draw around my yolks, marking where they are in the ‘bed’. This helps when you are digging them out later and helps you avoid damaging them before dehydrating.
- Once your yolks are fully submerged, make some marker to show their location in the dry bring. Easiest would be to use a single peppercorn on top of where they are buried. Again, this is to help you know where to scoop them out, and helps to not damage them!
- Cover (with plastic wrap or cover) and place in fridge for 4-7 days. Leave them be. Just forget about ’em!
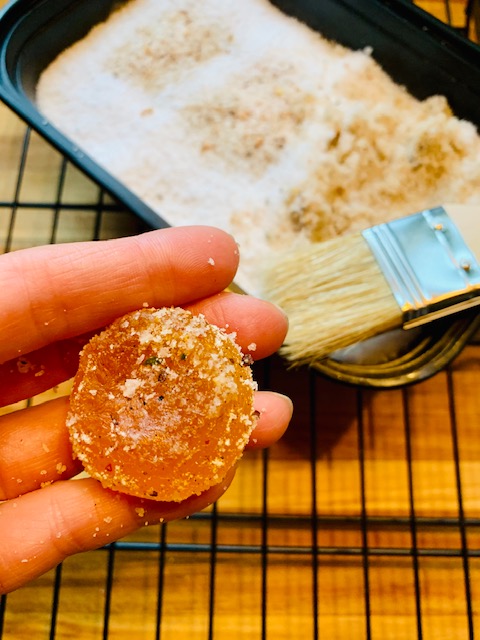
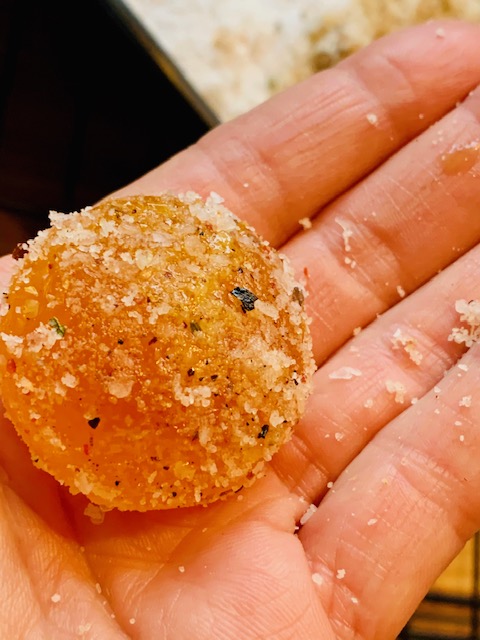
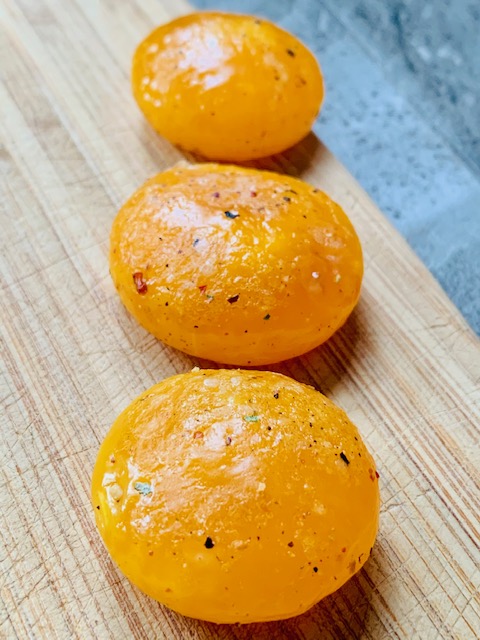
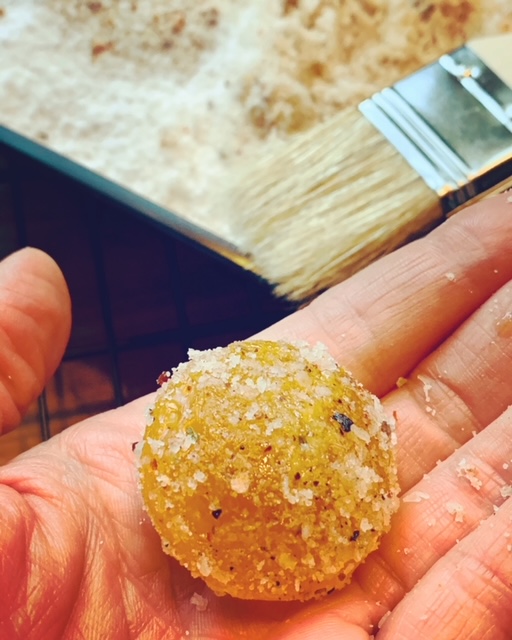
- At the end of their curing period, scoop them out of the mixture and brush as much of the salt off as possible (using a pastry brush or paper towel.) The yolks will be translucent and almost gel like. They will be solid, but still tacky, so be careful when brushing off. You have yet to dry them, so they are still a bit fragile.
- Once you’ve brushed off, quickly run gently under cold water and wipe any remaining loose salt off. Tap dry very gently with paper towel.
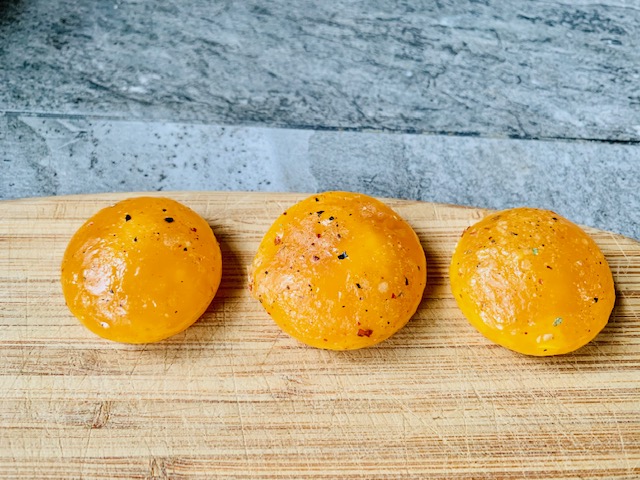
- Now to dehydrate. You can dehydrate with several methods: 1. set food dehydrator to 150 and place yolks inside for 1.5-2hrs; 2. turn oven to 150 degrees and dehydrate eggs directly on the rack (oiled) for 1.5-2 hrs; 3. place eggs directly on oiled rack in OFF OVEN for 2 days; 4. wrap yolks in cheese cloth and hang to dry in a dry dark space (back of pantry) for a week.. HERE is a link to the method for old school dehydrating in option 4. This Vermonter’s blog is also a great little follow if you are interested in building up a pantry for self-reliance… (and her photos are awesome!) I used our food dehydrator and they were done in 90 minutes.
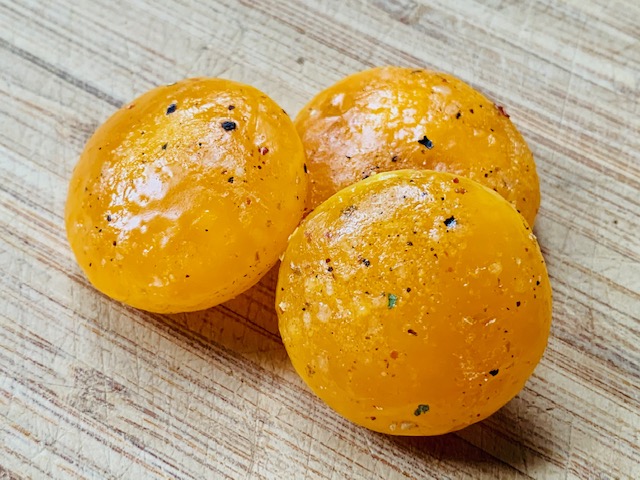
- Once your dehydrating process is complete, store in an airtight container and use with in 1-2 months… this is why making small batches of these are smart… and you WILL use them. Don’t make a huge batch and then let them go bad 😦
- On salads, pizza, pastas, desserts… think of it as a great dairy free alternative topping to cheese but also a way to add a twist to something as simple as vanilla ice cream.
Tart, salty and sweet umami goodness? YES, PLEASE!

Salt curing goes back… like WAY back. The first recorded use of salt in meat preservation actually began with the ancient Sumerians around 3000 BC. The Ancient Greeks used salt (with nitrite impurities) as early as 200 BC and to this day is the most prevalent method of preserving meats and fish. Even though, thanks to refrigeration, we don’t necessarily REQUIRE either dry or wet brining perishables to extend their consumability, the learned benefits from this method of preservation is the main reason we continue to do it. It makes some AMAZING foods!
Firstly, in terms of preparedness, most cured foods may be stored without refrigeration for weeks or months. Subsequently: “Salt curing also makes foods texturally denser and more concentrated in flavor. In meats, curing breaks down and tenderizes tough protein fibers, resulting in the compact yet tender texture of dry-cured hams, such as Prosciutto.” (reference HERE.)
It is this concentration and density change that brings us to the answer to the question in some of your heads: WHY CURE RAW EGG YOLKS?
CHOWHOUND has a great little piece about curing yolks which speaks to it’s many uses… both it’s current popularity to up the umami game in America, but even a bit of history as Chinese cuisine has featured cured eggs in many forms since as early as the 5th Century.
There is also a ton of science to the art of curing and why it has been relied on for millennia when it comes to preserving and preventing illness due to spoiled food. Head to WIKI to learn about all the chemistry behind curing and why this type of curing renders “raw” yolk safe to store and eat.
The great thing about salt curing, is that once you’ve done it a few times… you start to see the options that open up across a range of food preservation. Not just with eggs, but meats, veggies and fish… salt curing is pretty awesome. Make your own charcuterie board, friends! With eggs, you can easily adjust the salt/sugar content of your dry brine and the spice/herb additions to it… and change the flavor of your yolks completely… more savory, a little sweeter… there is so much runway with this topper. There is also the purist curing recipe which is basically ALL salt or a 50/50 salt blend with no spices. The above recipe is just to our household’s taste so omit or adjust away!
AND, why wouldn’t you want to get over your fear of curing your own items (for preservation or pleasure…)? I know I hope to be able to cure meats and have already made our own gravelax….
Whether out of necessity, preparation or just plain love of delighting your palate, salt curing is a great skill to learn as well as put to use regularly.
Tonight, one of these medallions of YUM will be incorporated into our faux caesar salad (which now will have all the elements of an actual caesar considering the addition of the shaved yolk on top, now that I think about it.)
My next cure will be more geared towards a dessert yolk… equal parts salt and sugar… with anise, black pepper, basil and lemon rind. In a few weeks, I will be making a new batch of macarons and will have more yolks… so – WASTE NOT. When you approach your kitchen with a planful (and playful) mindset, remembering to use as much as you can, you will be amazed at the items you can create.
One splurge of a decadent dessert project can also yield you 2+ months of umami goodness!
Enjoy!

This is an awesome idea. Especially for when I’m baking or making recipes that require only whites! 😃
LikeLiked by 1 person
It totally is! I know bakers often are at a loss (and sometimes a custard is just too rich and too fatty…) this is great as a topper for just about anything you could think of and it is adjustable to be as savory or sweet as you’d like!
LikeLiked by 2 people
😊
LikeLiked by 1 person
As always, beautiful pics and an interesting topic. Thank you for introducing me to salt-cured egg yolks.
LikeLiked by 1 person