Ahhhh summer. You elusive, oft cursed in the heat of July but yearned for in the depths of January fickle timeframe.
I will say up front: I am not a huge summer fan. Never have been beyond the age of 12 (my mother worked at a campground close to my house every summer while I was growing up so I had a pool and tons of adventures at my disposal. That was probably the last time I was a SUMMER junkie.)
Now? Well, I would say I am a camping season junkie… and that season includes all of summer. LOL. Gone are the Coppertone drowned beach cravings. Now? Now, it is about a good book, a lake or river, some shade, a local session brew and a kayak. And a sturdy toddler enclosure. Like, REAL sturdy.
Two fruits make me think of summer: watermelon and mango… *sigh* … *eyes glaze over reminiscing of roadside cayenne mangos in the tropics* … *sigh*
But back to WATERMELON: This macaron recipe is all about bringing camping season and summer a bit closer with a few bites thanks to my new hobby of macaron-ing. There might have just been a snowstorm in April, but these beauties will have me thinking of lounging in an inflatable tube that is tied off to a tree, bobbing lazily in the easy rolling wake waves from a passing waterskier….
Watermelon Poppyseed Macaron (makes approx 40-45 macs)
Ingredients
Shells:
- 212g super fine ground almond flour(highly recommend Bob’s Red Mill Super Fine)
- 212g confectioners sugar
- 172g egg whites (at room temp, divided into 82g and 90g respectively)
- Pink and Green Gel coloring (you will be dividing the batter pre-coloring)
- 236g granulated sugar (plus a pinch for egg whites)
- 158g water
Salted Watermelon Poppyseed Buttercream
- 1/2 cup unsalted butter (1 stick)
- 1 1/2 cups confectioners sugar
- 1 tbsp milk
- 1 tsp vanilla extract
- 4 drops Watermelon oil
- 1 tsp poppyseeds
- kosher salt for finishing
Instructions:
Shells
- Place almond flour and confectioner’s sugar into a food processor and blend/pulse to fully combine. If your almond flour is on the coarser side, continue to mix to reduce the grind to as fine as possible. This will give you smoother top to your shell
- Once blended, run the flour mixture through a fine mesh sieve into a large mixing bowl. This is to remove any larger flour particles. You will be left with about a tsp to a tbsp of solids… don’t worry. Just toss them 🙂
- Now, divide the dry mix in HALF (I did this by weight and placed each half into a medium mixing bowl.)
- Make a small well in each of the dry mixes and place in 41g of room temperature egg whites (yes, we are using the scale A LOT with this one, but it’s to make sure we can create the sight consistency in each batter using the Italian method. Mainly due to when you add in the gel coloring in this method.)
- Gently mix in whites with small spatula. It will form a thick paste.
- Add in your gel/food coloring. I used about 1/8 tsp of each coloring to make a nice deep green and deep hot pink color. Remember once you add in your whipped egg whites, the color will dissipate a bit.
- Once colorant is filly mixed in, set aside and move on to making your meringue (note: make sure you have all of your equipment ready to go at this point… like 3 piping bags with tip, prepped baking sheets with parchment and templates if using…you’ll be piping as soon as you finish your batter so it does not deflate!)
- Place the 90gs of room temp eggs in the bowl of a stand mixer (when making macs with this Italian meringue, a KichenAid is the easiest way not to lose your mind…. you can beat your egg whites hands free while minding your syrup!)
- Add your water and sugar to a heavy bottom, small saucepan and bring to rolling boil over high heat.
- Once your syrup mix hits a consistent boil and is approaching 220 degrees, add a pinch of granulated sugar to your egg whites in the mixer bowl and start whipping them. If your egg whites stiffen up before your syrup is fully ready, just reduce the speed to low to keep them moving. You can get them back to soft peaks pretty quickly later.
- The easiest way to mind this process is to use a candy thermometer (or frying thermometer) which can be affixed to your saucepan. This will allow you to move back and forth between checking the egg whites and checking the syrup temp with ease.
- Heat your syrup to 245-248 degrees (do not go above 248 you will start getting into hard ball territory and actual candy making…. watch that temp!)
- When your syrup is ready, check that your mixer whites are at soft peak status…. turn your mixer to HIGH and begin to drizzle the syrup down the inside edge of the mixer bowl in a thin stream. You want to slowly add the syrup to the stiffening whites (this is HOT and will cook/deflate the whites if you add too much too quickly)
- Continue to add syrup and whip on high until your whites achieve STIFF GLOSSY PEAKS (note: you may not need to use all of the syrup). Continue to beat until mixer bowl has cooled back to room temp.
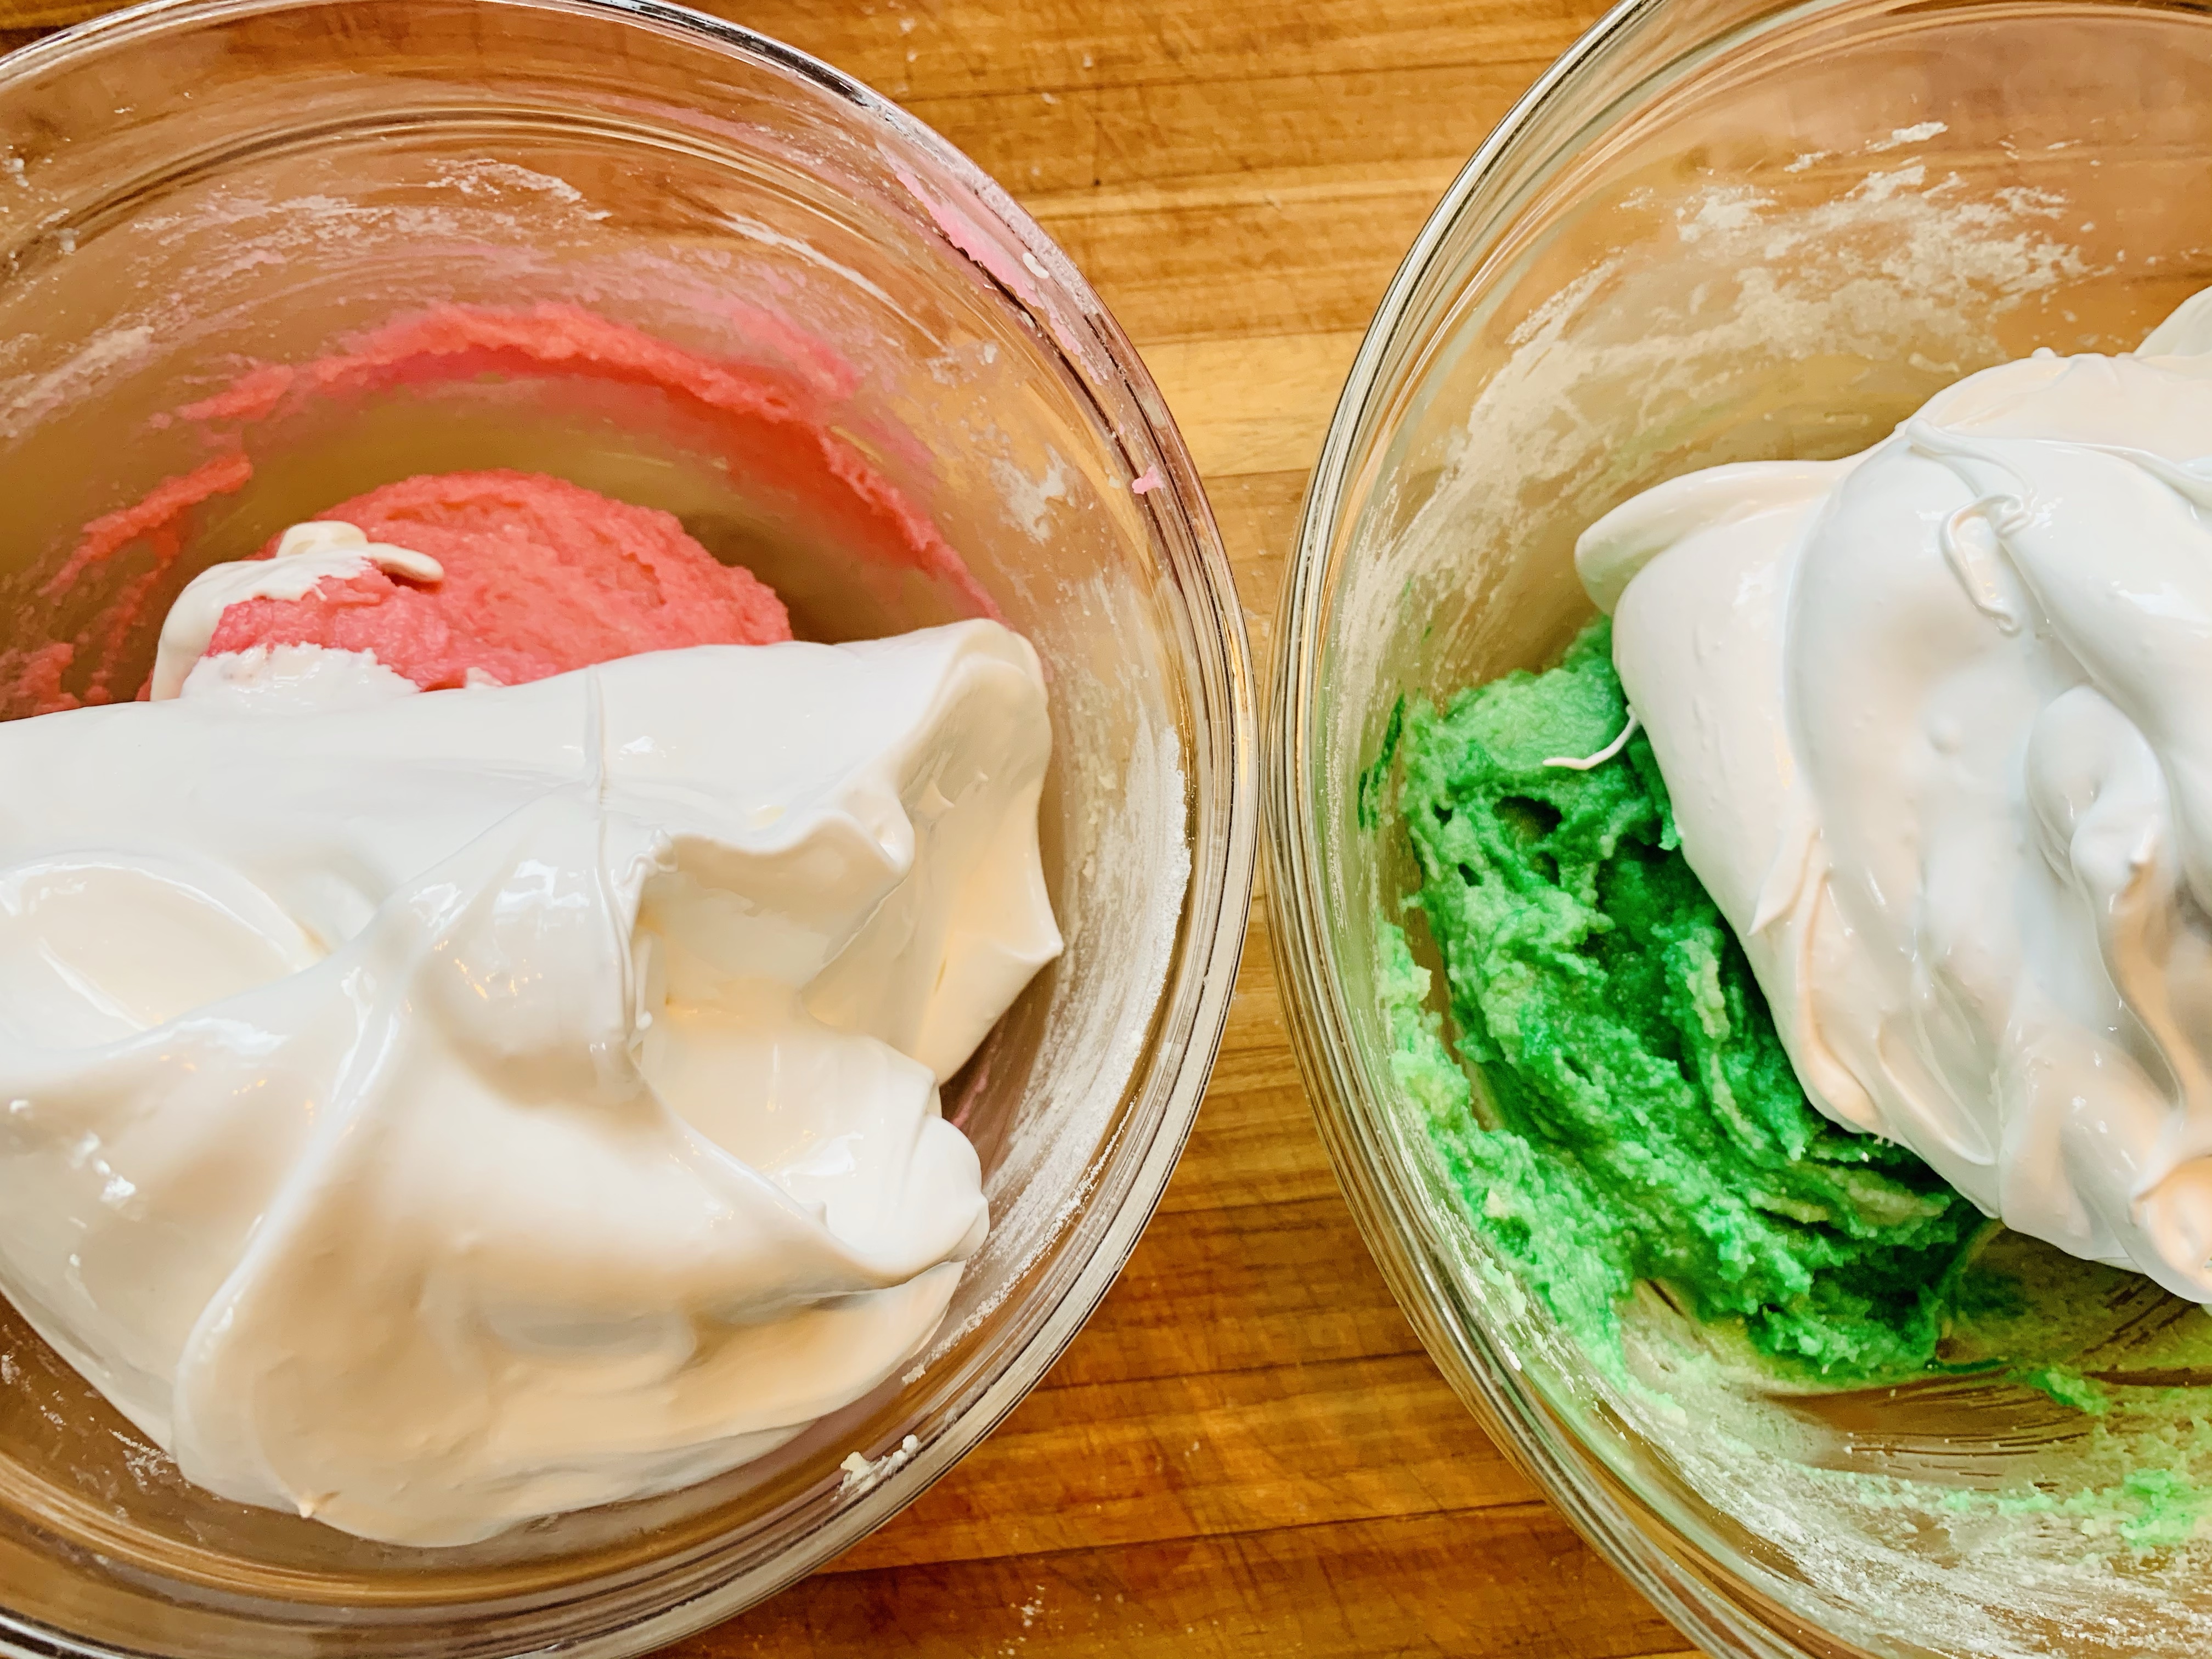
- Once your meringue is ready, you will be splitting it between your pink and green batter bowls. I eyeballed this and things came out ok. If I wanted to be a perfectionist, I could have halved the 90gs of whites and separately created stiff peaks the Italian method with that, but nahhhhhh.
- Fold whites into colored batter… this is your macronage. Now, with this process of shell making (versus a few other methods), I like to fold a bit differently. Rather than ‘tucking in’ the meringue, I like to get a bit more aggressive with it. We’ll call it the ‘scrape, scoop and pull’ method of folding…LOL. I basically take my spatula 3/4 the way around the inside edge of the bowl.. scooping and folding a large amount of the batter over itself then pulling the spatula back through that ‘folded over’ batter flat along the bottom of the bowl…cutting the batter in half almost. It takes practice, but this more aggressive method incorporates the meringue a bit quicker. This is not what I would recommend, though, if you are not using the Italian Meringue method. There are videos out there (or I can make one quick-like if you are interested!)
- Continue to fold your batter until it hits the desired consistency (it should fall off the front of the spatula in a nice flat ribbon without breaking, or you should be able to make a figure 8 fully without the stream breaking…. if it breaks, keep folding… this can be anywhere between 30-40 strokes after the meringue is all incorporated.)
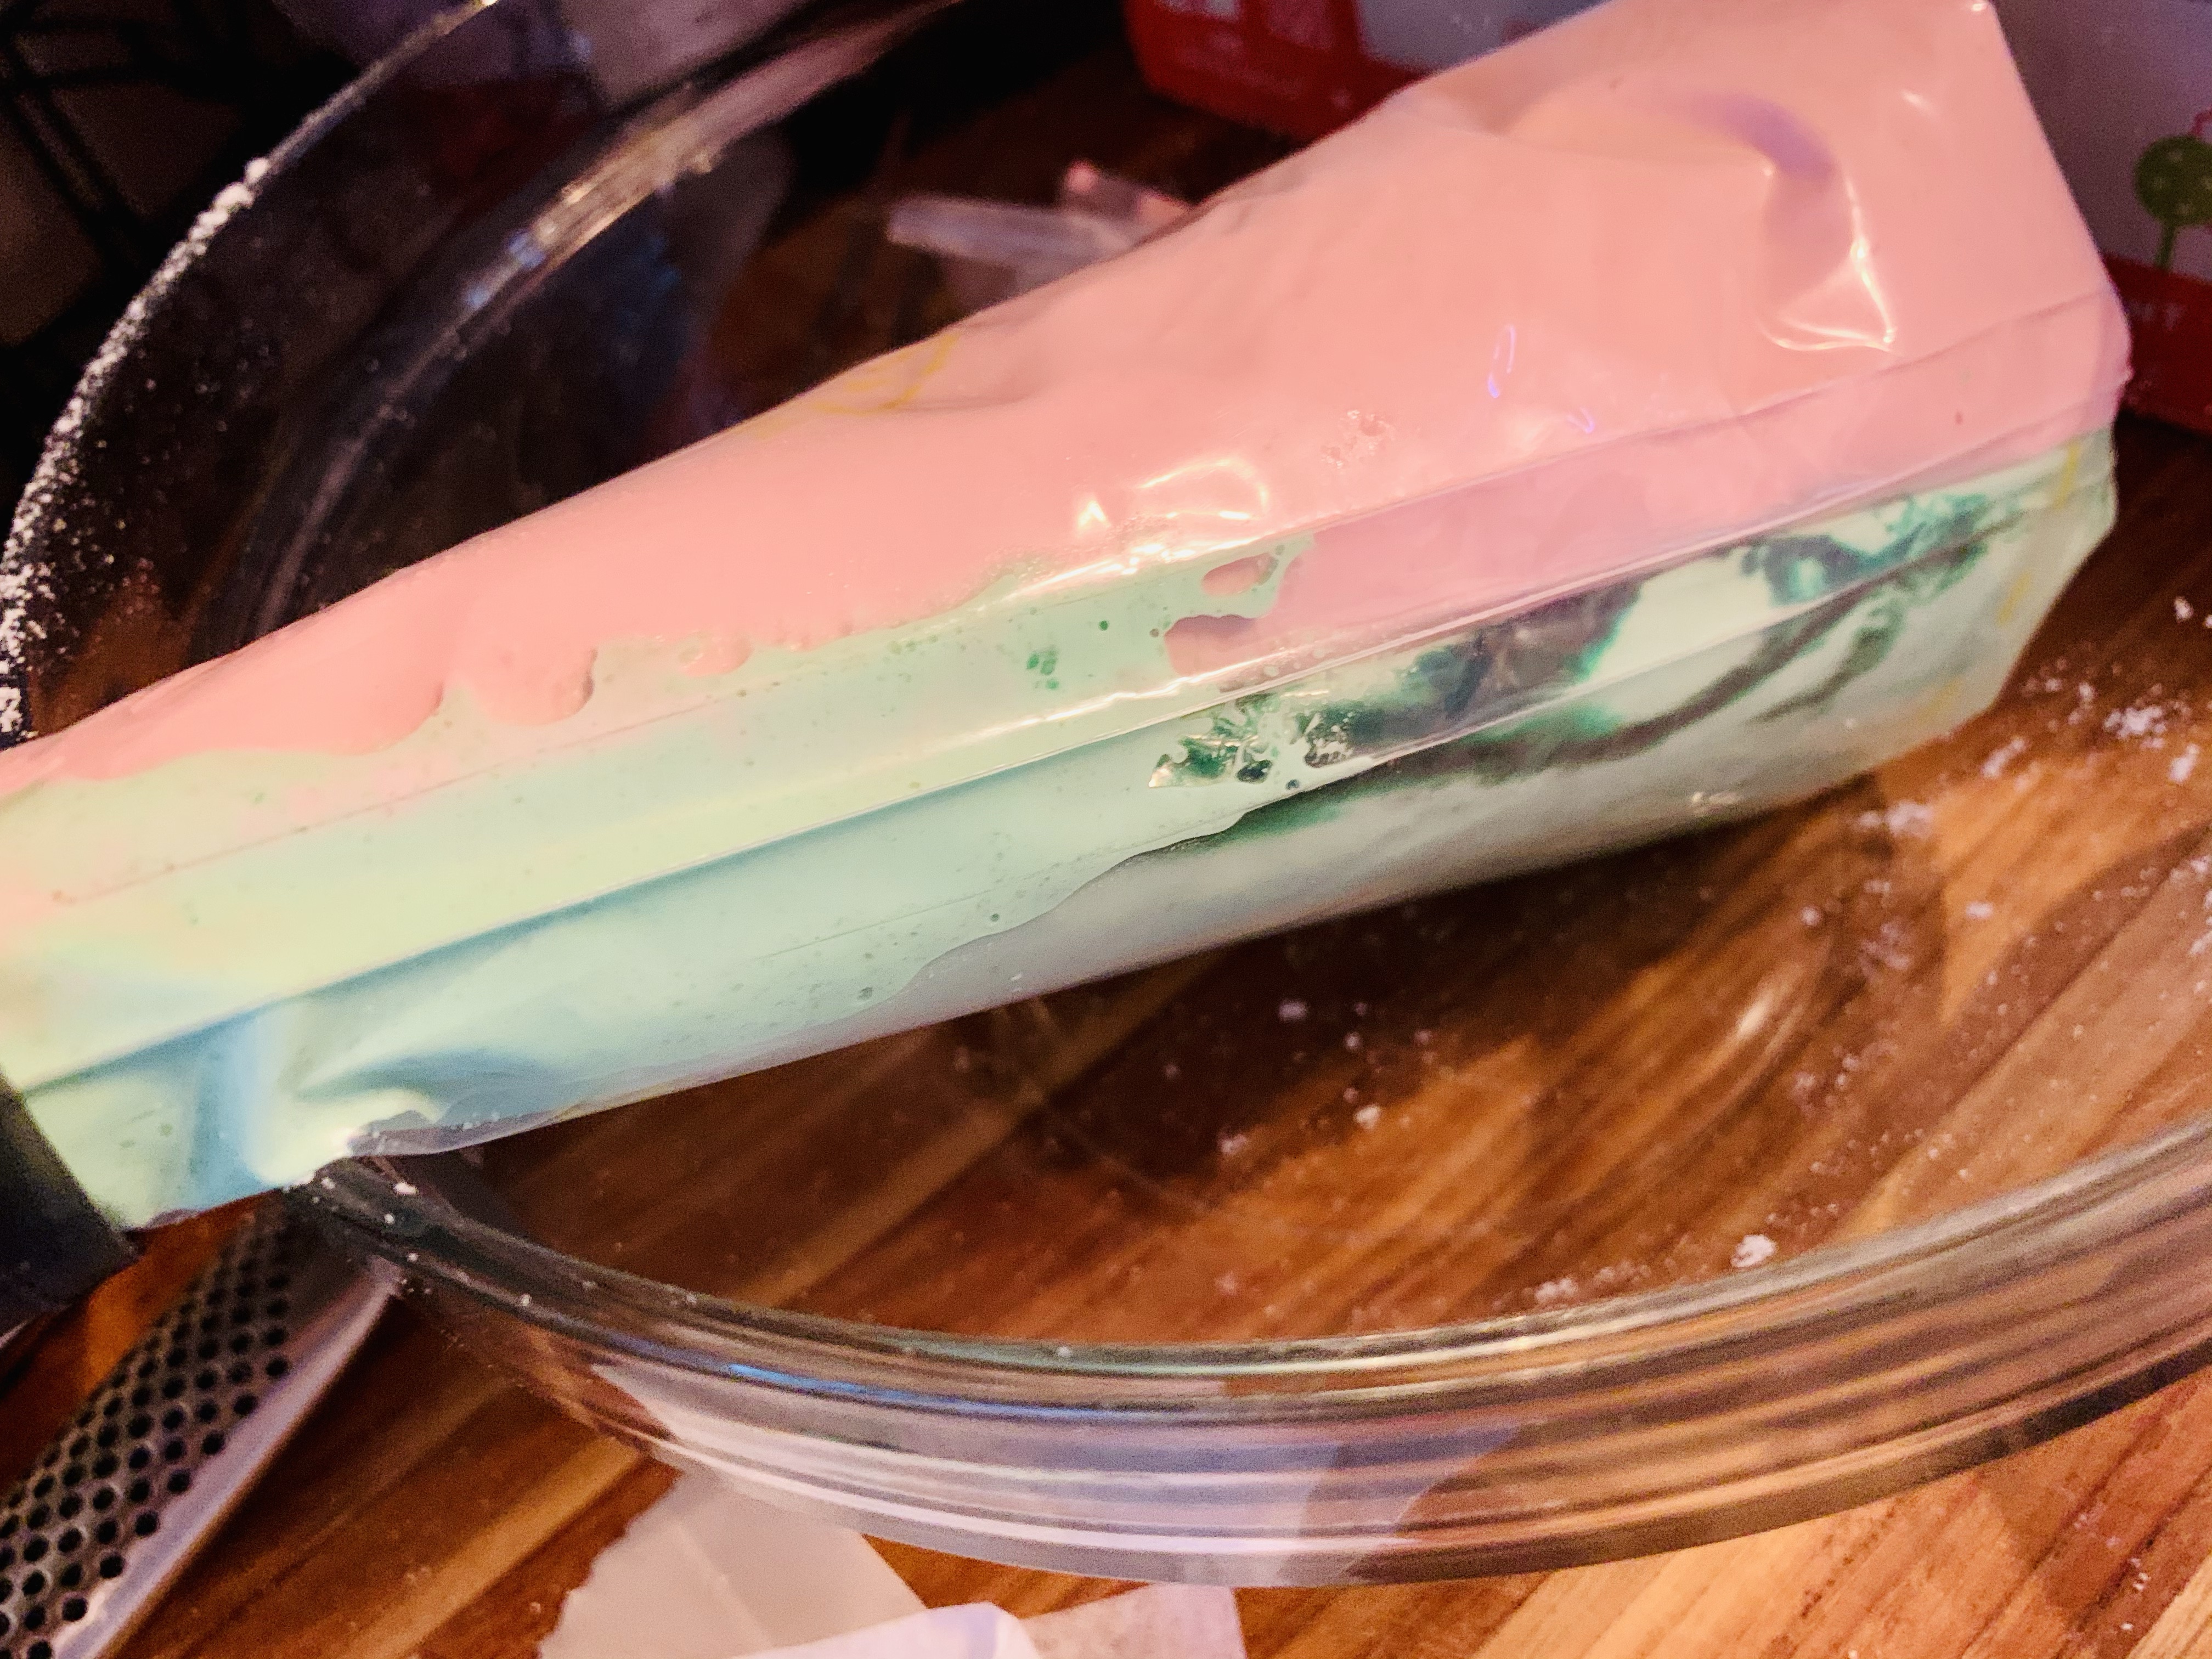
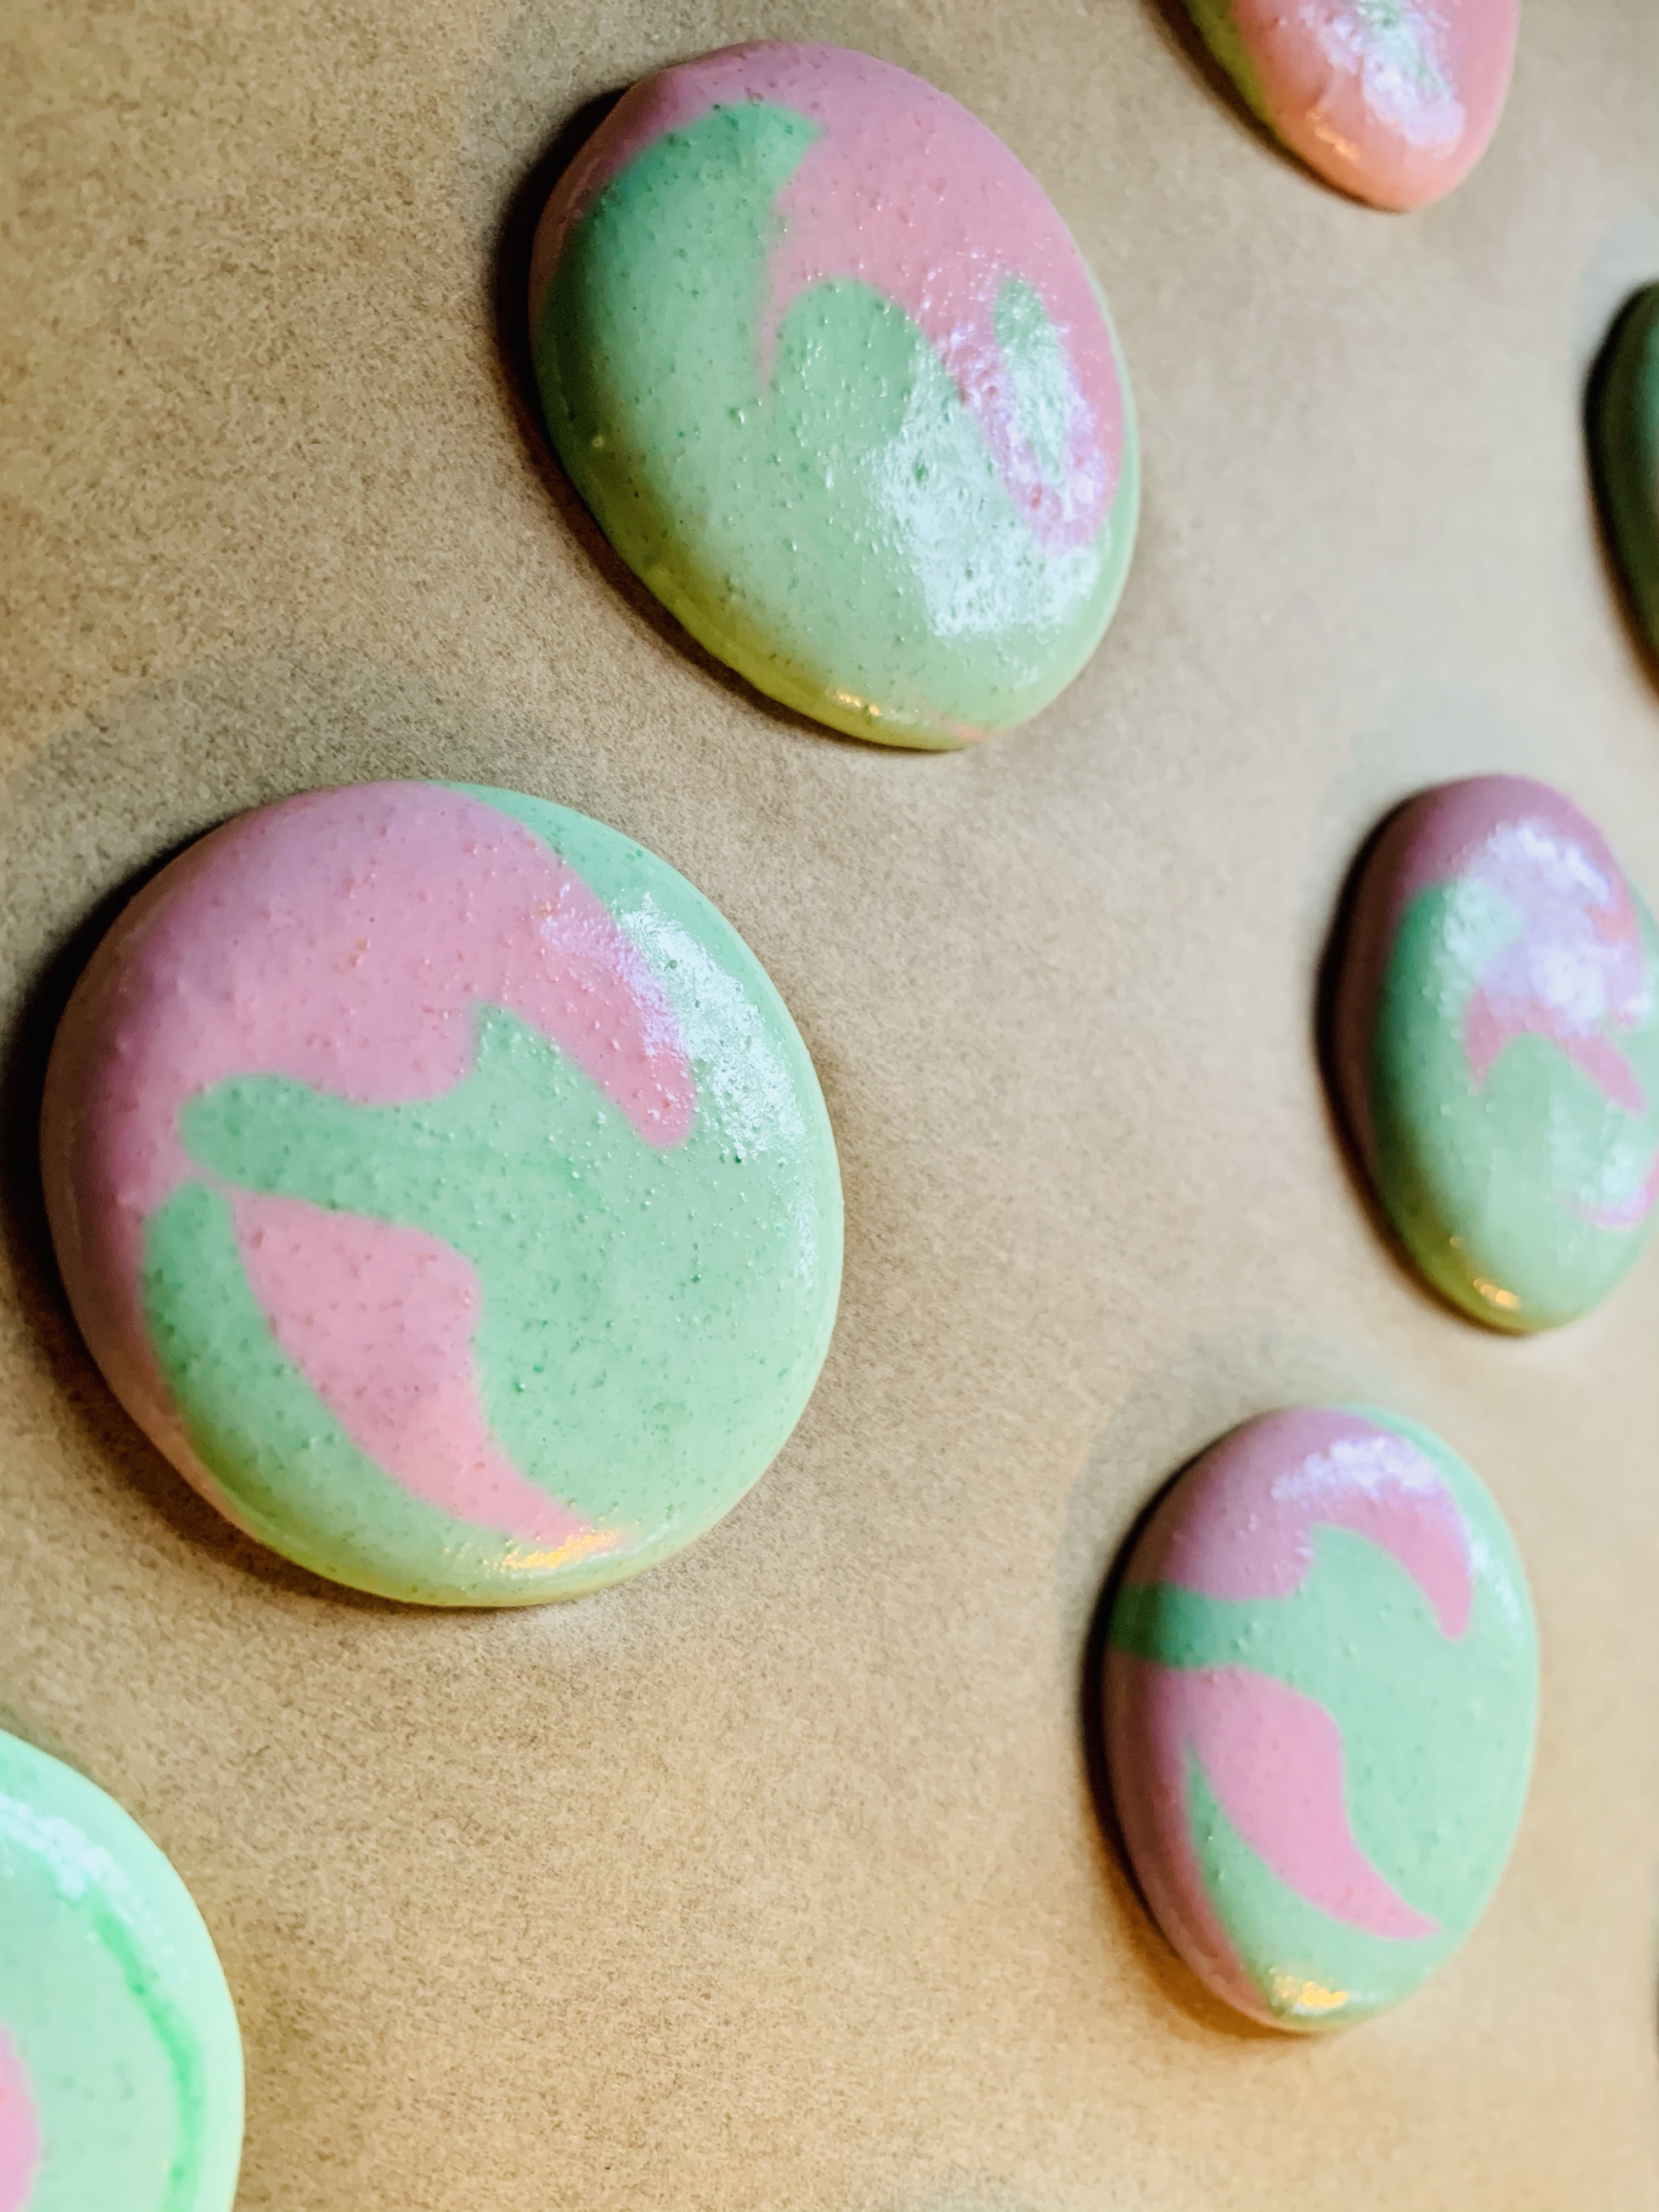
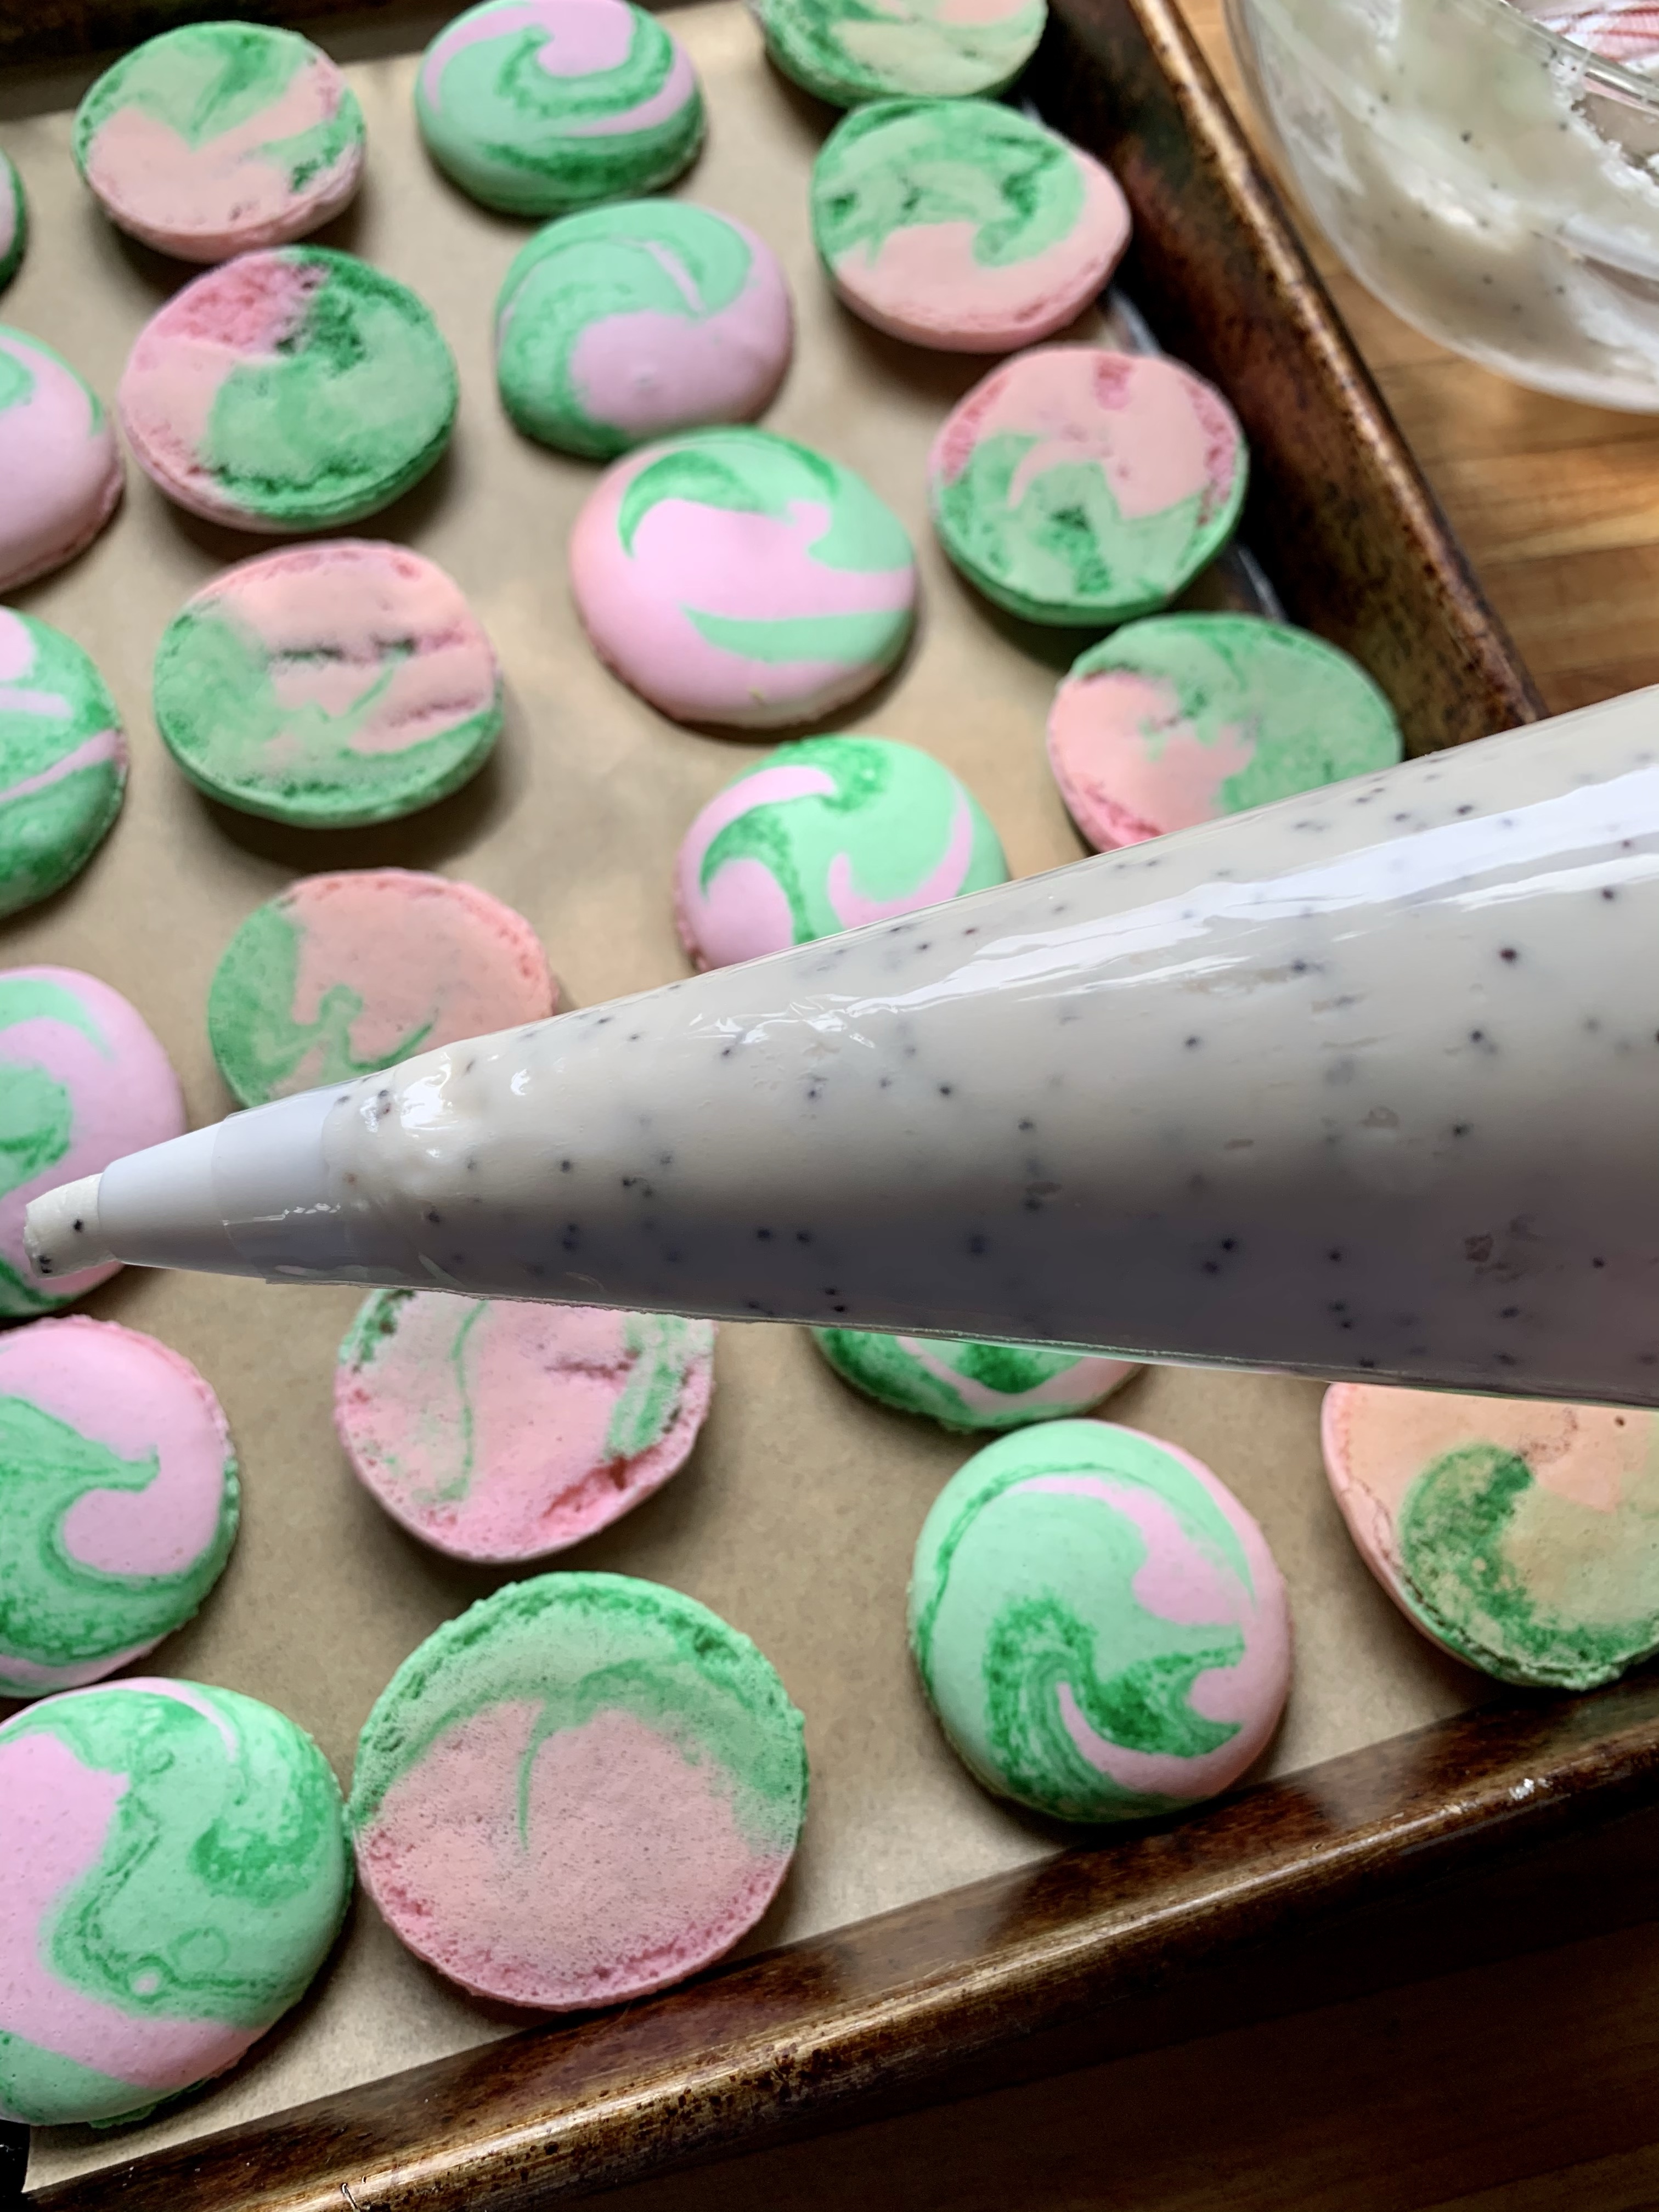
- Once you hit the right consistency for piping, take two 16″ piping bags and fill each one (no tip attached) with one of the batters. NOTE: I wanted the green to have the appearance of the green rind of a watermelon so I took a toothpick and dipped it into the green gel, then striped that coloring up the inside of the green piping bag in a few places BEFORE adding in the batter…) Prep a 3rd piping bag (also 16″) with a 1/4″ round tip. Snip about 1/4-1/2″ off the bottom of pink and green bags and slide them both into the bag fitted with the 1/4 inch tip and get to piping! (YES, swirled macs are THAT easy!)
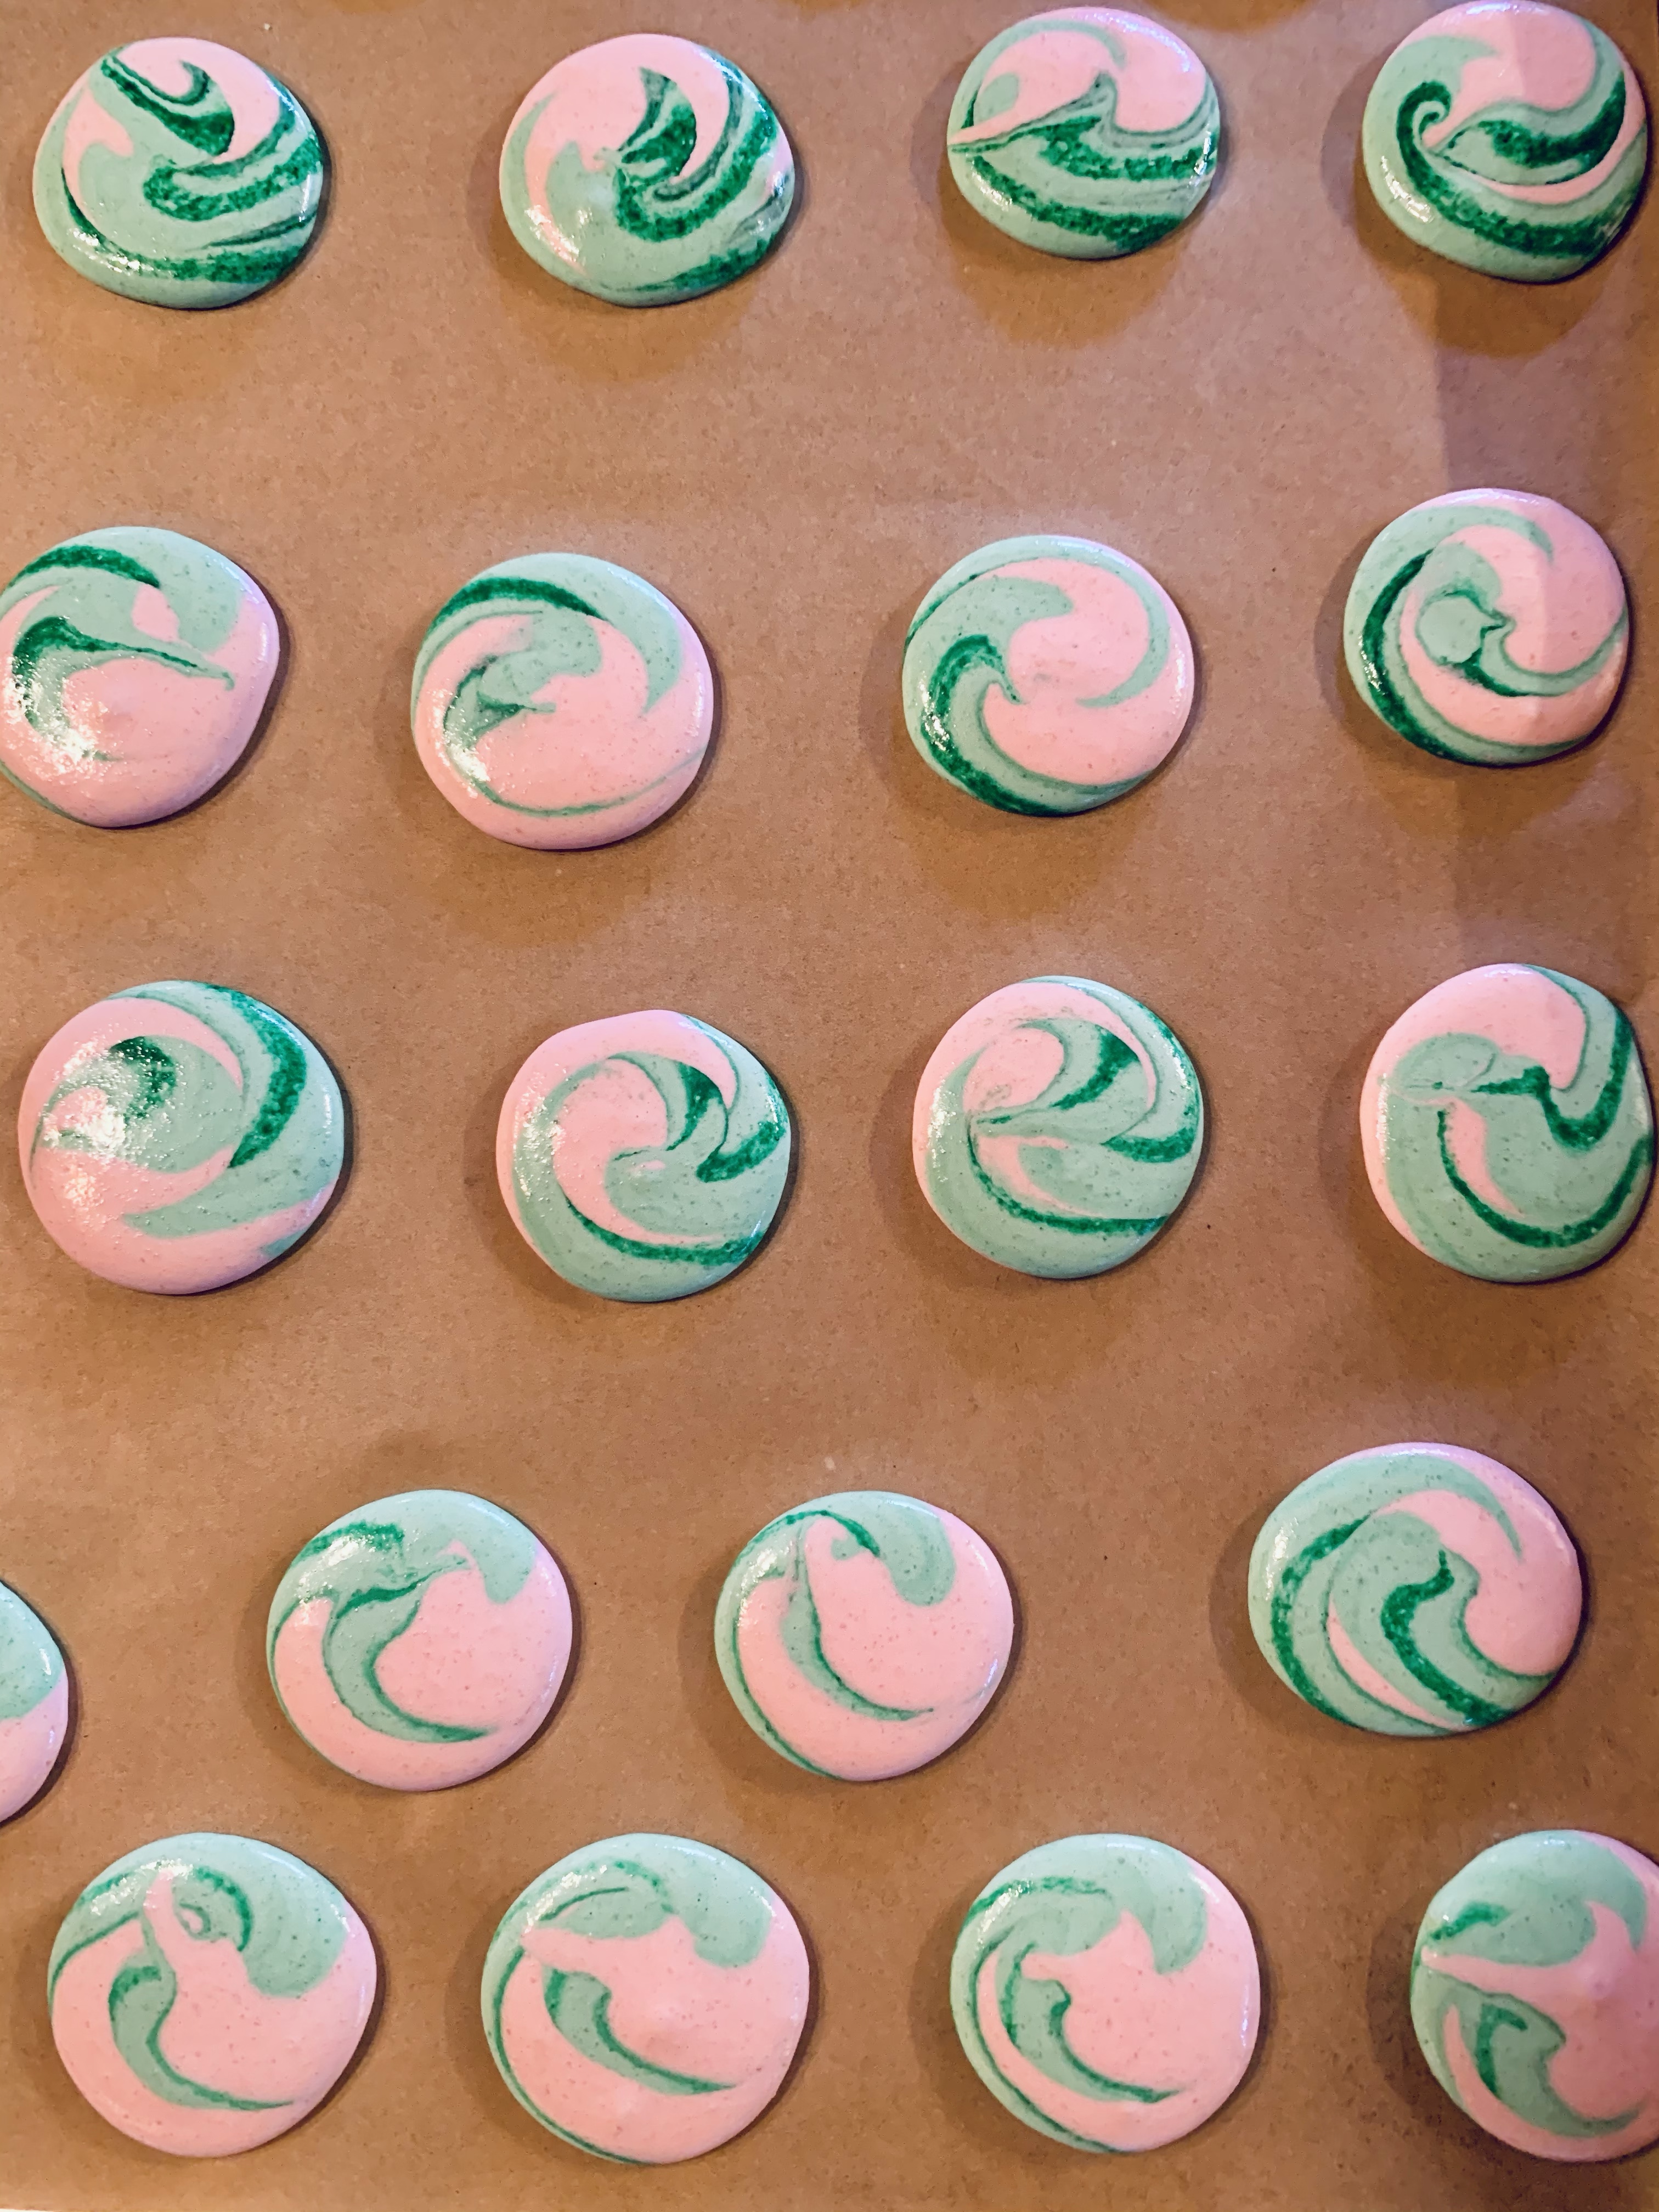
- Pipe out your shell onto the parchment leaving 1 inch of space between them. Traditionally, you would want them approx 1-1.5 inches when piped.
- Once all of your shells have been piped, lift your baking sheet and drop it from approx 1 foot above the table/counter about 5 times. Rotate the sheet 180 degrees and repeat. This is to coax any air bubbles in the shells OUT (air bubbles in there will result in your shells cracking!)
- Let your shells rest for 30-60 minutes, or until their ‘skin’ forms (you can run your fingertip along the top without it sticking) If it is humid (aka like yesterday: raining here) it may require a longer rest, or the help of even some circulating air. I rested the piped shells in my 4 seasons room with the ceiling fans on!) Be patient: rest them until their skin is formed.
- While shells are resting, preheat oven to 325 degrees
- When shells are ready, bake for 8-10 minutes. (I set for 8 minutes and then check for doneness as I have no light in my oven NOR a window LOL… yay for ancient cookstoves.)
- Minding the feet is how to know when they are ready. If the feet start to get toasty/browned take them out!
- Remove from oven and let cool on baking sheet for 5 minutes or so.
- Carefully remove baked shells from parchment and allow to fully cool on a cooling rack. They should lift off easily without leaving any shell behind.
- Repeat the baking process with all remaining sheets of shells.
- Once shells are all baked, cool them for at least an hour in the fridge before filling (this step is for 2 reasons, to allow any moisture in the shell to be absorbed by the almond flour… creating that amazing ‘crunch and chew’ of a great shell… but also to make sure that you are not piping filling into anything warm risking it melting! EEEK!)
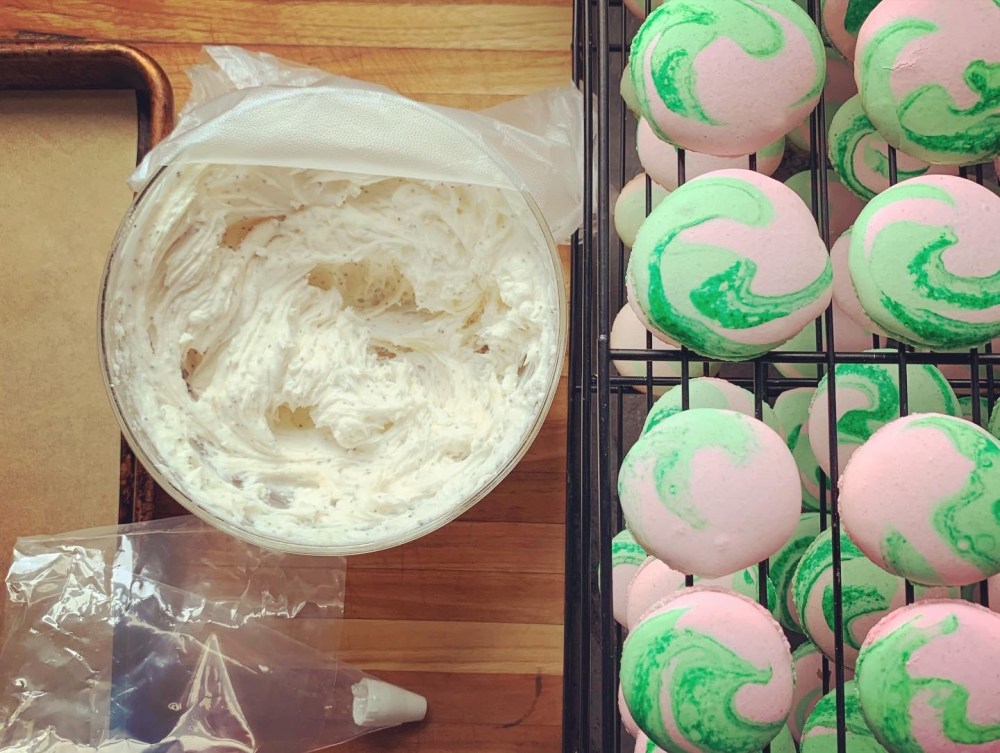
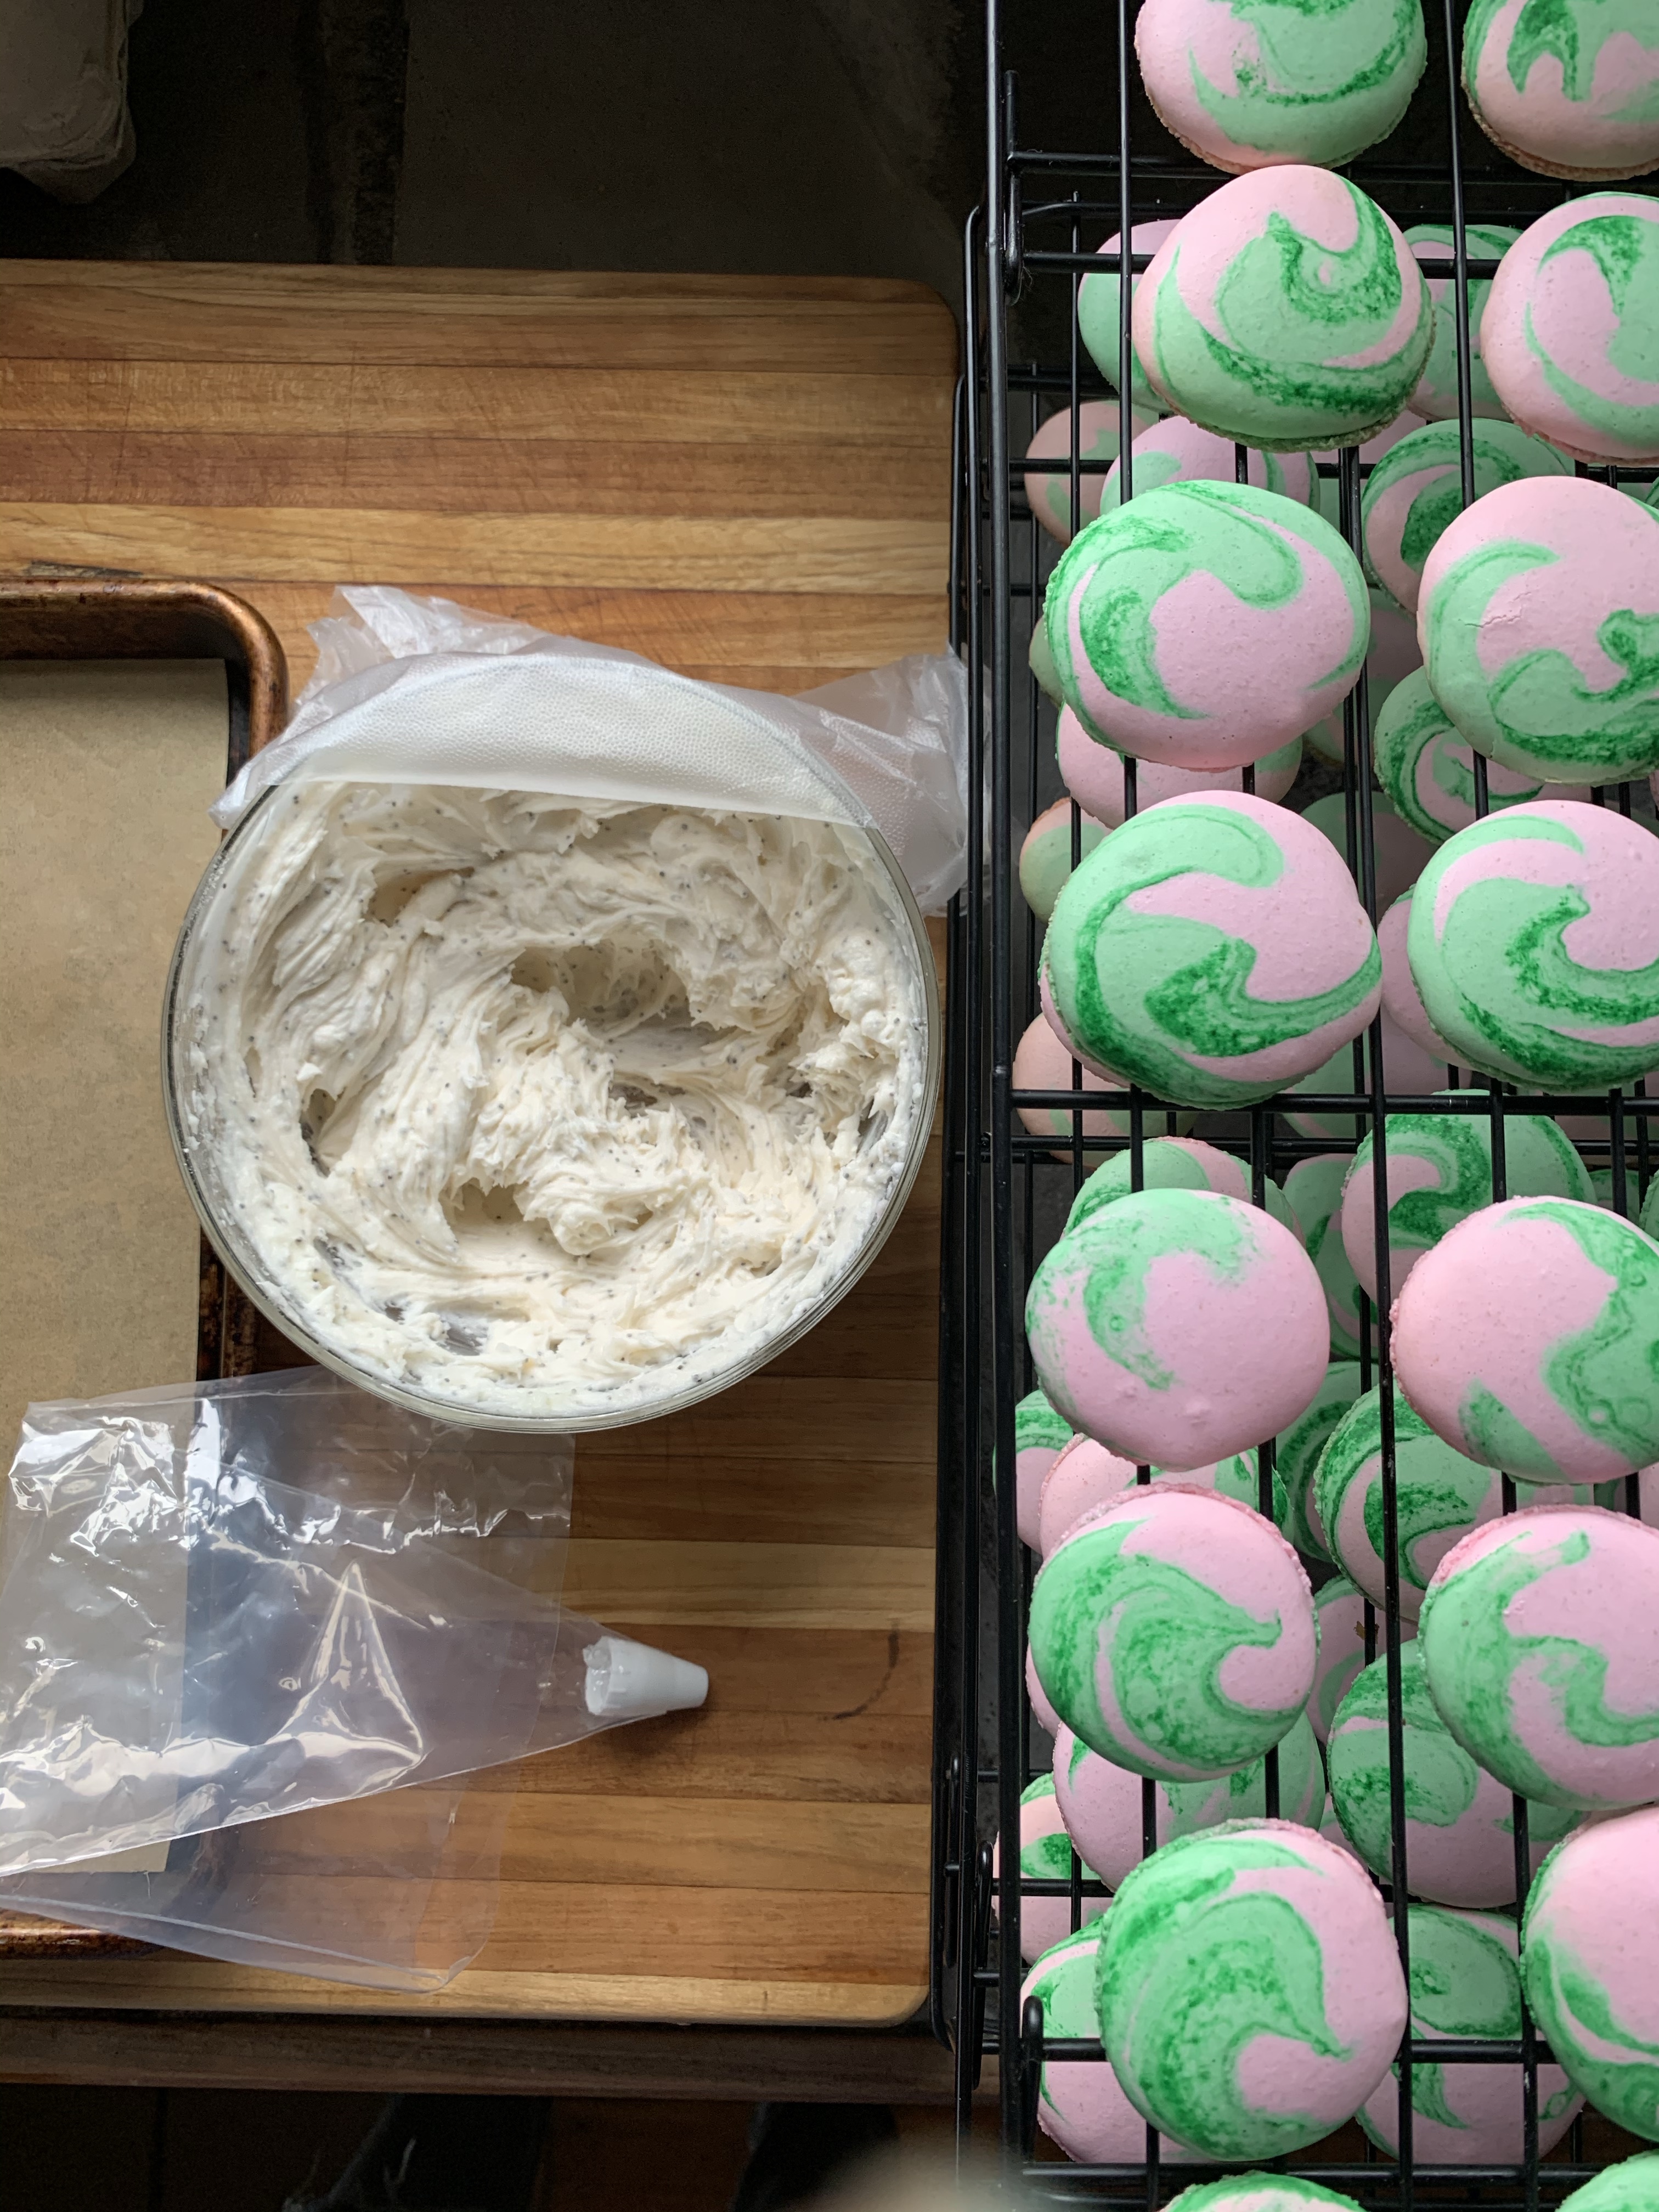
Salted Watermelon Poppyseed Buttercream
- Place room temp butter into a deep mixing bowl and using a hand mixer (or by hand) whip to a fluffy consistency.
- Add in 1/2 cup of confectioner’s sugar and mix (starting slowly so as to not send all sugar flying)
- Add in another 1/2 cup of confectioner’s sugar and vanilla and milk, mix to combine
- Add in remaining 1/2 cup confectioner’s sugar
- Add in the 4 drops of watermelon oil (if you want it to be lightly flavored, start with 2 drops and gradually add to desired intensity.)
- Add in your poppyseeds, mix to combine.
- Check that your consistency is good (if it is too thick, add a 1/2 tsp of milk until it is at a good piping texture. Remember that you store these chilled so the filling with thicken in the fridge.)
- Taste and adjust as desired.
- Fill piping bag with 1/4 in round tip (a plastic baggie with the corner snipped works fine too) and fill your shells. Remember to match them up first so you get a nice, uniform macaron
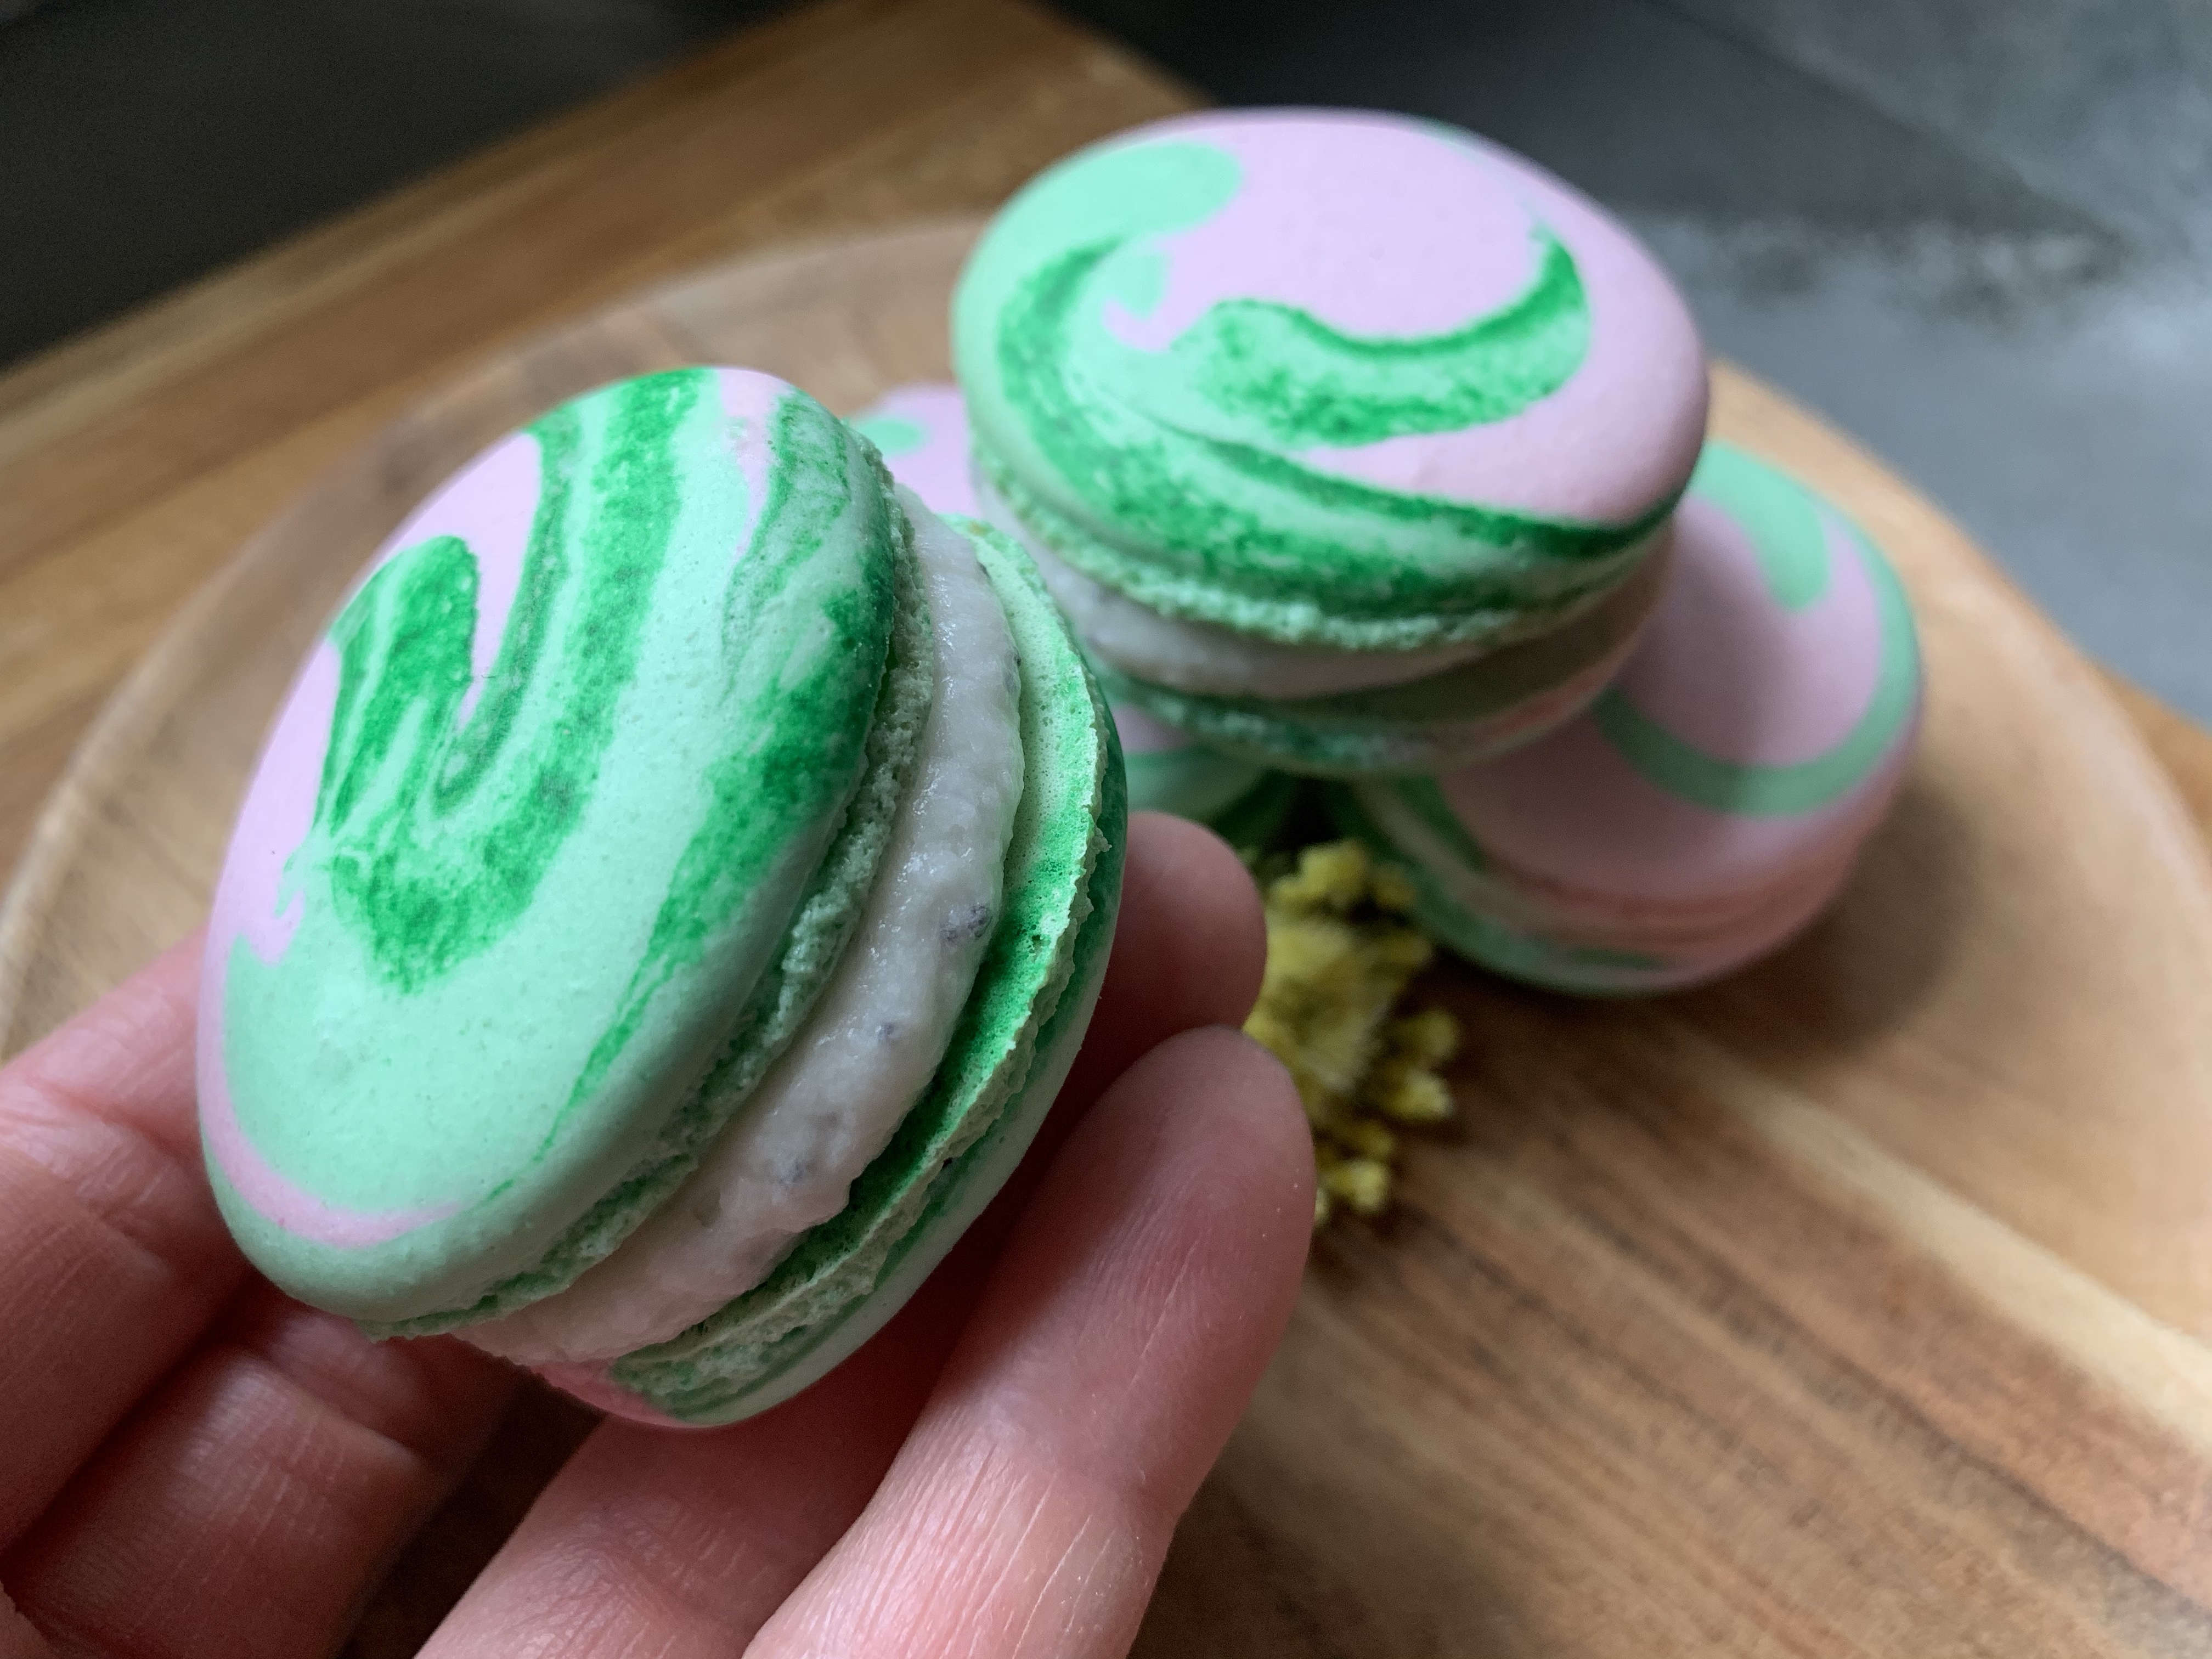
- Before topping, sprinkle a few flakes of kosher salt on top of the filing then add top.
- Store finished macs in an airtight container in the fridge and enjoy for up to a week. (note: they are still yummy after a week! Just a bit dryer the longer they are in there… don’t forget you can also freeze these babies!)


This is the first mac I have made in 4 WEEKS! Wow.
That just says how much work is needing to happen outside to prep the garden, build the new additions and generally get the property ready for warm weather!
The mindfulness moment I had with this recipe was to take inspiration when it comes your way…. I was planning on just making a simple green and pink solid shell combo for these, but hubs walked by and asked if I was going to swirl the colors or something fun like that… and even though I’ve never done it before (I mean, I’ve watched some videos a while back but nothing recently) and decided on the spot I was going to just go for it and figure it out on my own. The rind idea worked brilliantly and they look so pretty they’re hard to eat! Well, not really THAT hard, but they are lil pieces of art… each one unique and gorgeous in their own way.
The next #macaronchallenge is going to be Creamsicle. (kinda running on this summer lovin’, camping season kick right now that we are less than a month away from setting up and sleeping outside!)
I MIGHT be forced to make a bellini mac as well… mimosas are fun but I prefer that peachy goodness (and one of our new trees has some fruit set! Fingers crossed!)
What’re your favorite summer flavors?

Wow! these look so beautiful! Love the colors and the swirly pattern!
LikeLiked by 1 person
Thanks! A new piping technique I was trying (and will be doing again with some additional “summer lovin” flavors….) I had thought it would be more difficult, but it is so EASY!
LikeLiked by 2 people