Babka. Twisty, messy, challenging, and adaptable…this sweet bread is a just reward (and metaphor) for enduring these first few weeks of 2021. So why NOT take this beautiful baked good on as a means to channel your energy?
Full disclosure: this will 1. take approximately half of your day, 2. cause you to doubt your ability to bake and 3. encourage you to string a few obscenities together in new, creative ways.
Does it look like a Pinterest Fail until you taste it? YES.
Is it worth it in the end? YES.
Can you totally approach this crazy kitchen challenge as a practice in mindfulness? YES.
There are 4 parts to this recipe. Some can be done in advance, but as I found out, one of them most certainly should NOT.
Cherry Cheese Babka (makes 2 loaves… one for eating, one for freezing!)
Ingredients:
Preserves (You can choose to make your own or use store bought. Below is my quick go-to recipe for all preserves)
- 3-4 cups mixed sweet and sour cherries (fresh or frozen)
- 1/2 cup water
- 1/2 cup raw sugar
- 1 tsp lemon zest
- juice of 1 lemon
- 1/2 tsp cinnamon
Dough (This is BRIOCHE, people. This is one to bookmark for future use for french toast!)
- 4 cups all purpose flour
- 1/3 cup sugar + 1 tsp sugar divided
- 1 tsp kosher salt
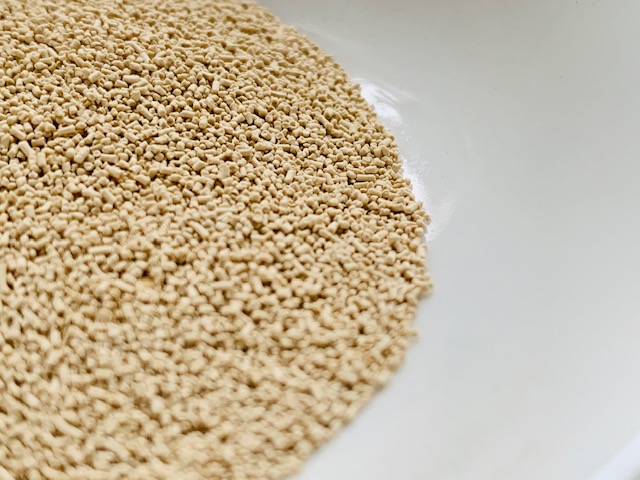
- 1 pkg active dry yeast about 2 1/4 tsp
- 1 cup milk warmed to about 100-105 degrees
- 2 eggs room temp
- 1 tsp vanilla
- 10 tbsp unsalted butter very soft and cubed
Sweetened Cheese
- 1 package of cream cheese (8oz, softened)
- 1/2 cup sugar
Sugar Syrup (I know it seems weird, but I 100% back this)
- 1/3 cup sugar
- 1/3 cup hot water
Instructions:
Preserves (This step can be done in advance for prep and ‘day of baking’ time saver)
- place all ingredients into small sauce pan over medium heat
- simmer for 10 minutes, breaking down cherries if possible
- briefly remove from heat, taking stick blender (or potato masher) to cooked cherry mixture to break down mushy cherries
- return to heat, simmering until mixture thickens (about 15-20 more minutes)
- remove from heat, transfer to quart ball jar and place in fridge to chill completely
- check for thickening… if the preserves are still liquidy once fully cooled, return to stove to thicken (this step will help reduce the separation in your bread swirls)
Dough (Can also be done in advance, but still requires rising on day of baking so I don’t see a benefit, personally.)
- in the bowl of your stand mixer, add warmed milk, tsp of sugar and yeast. Stir to combine and let sit for 5 minutes. Goal is to see yeast ‘waking up’ and creating a foam on top.
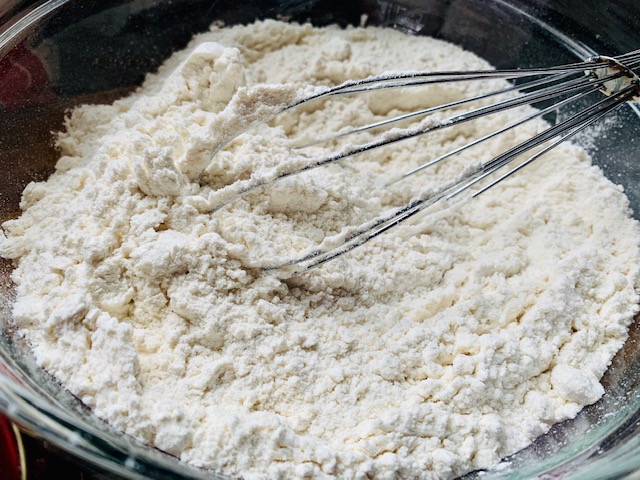
- While yeast proofs, whisk flour, sugar and salt together in large bowl
- Add eggs, vanilla and dry mixture to stand mixer (with dough hook attached) and mix on low until combined. You may need to scrape sides down, or stop mixer quickly to scrape up dry ingredients from bottom center.
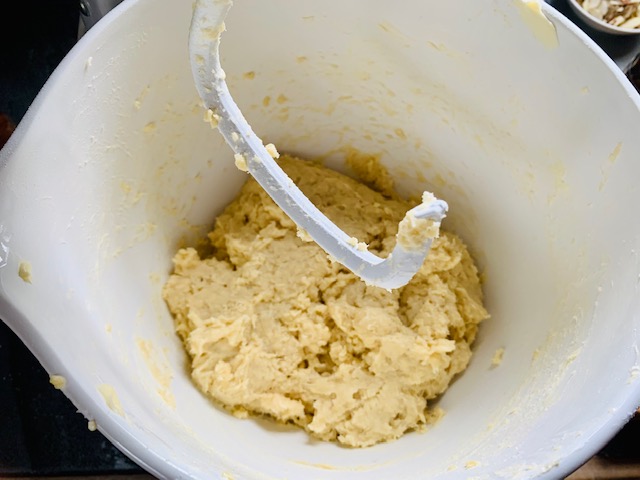
- Once dough is smooth, add extremely soft butter cube by cube, incorporating into dough. This step is FRUSTRATING and feels like failure with every new cube addition. You will need to help the dough by directing it with your small spatula, pushing it into the dough hook and seeing the butter/dough roughly incorporate bit by bit. Do not be shy. It is a WIERD step and the dough should appear almost ‘aerated’ with butter when done.
- Once all butter is added and the dough has ‘loosened’ up a bit with the addition of the butter, you can bring the mixer speed up to medium (4 or 5) for a few minutes to further work the dough
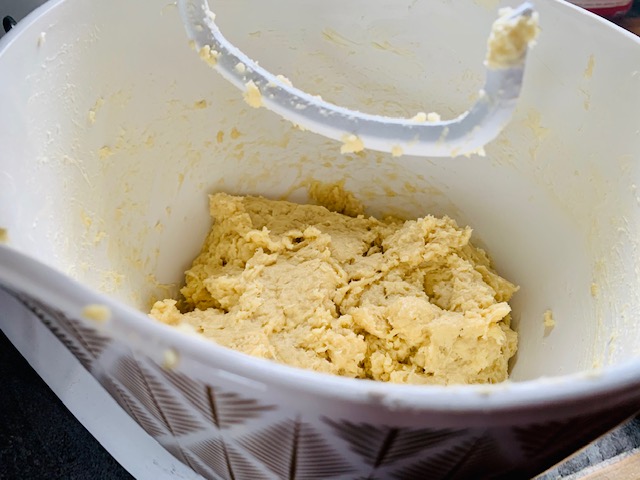
- When butter is completely incorporated, remove bowl from mixer and cover with plastic wrap
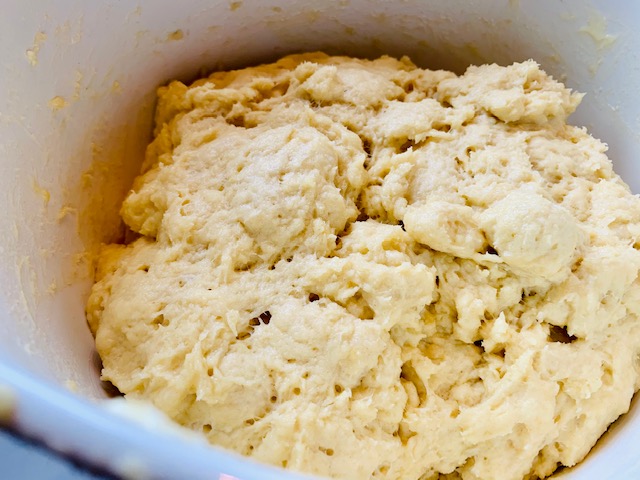
- Set in warm room and let rise 1-2 hours, or until it has doubled in size. I placed in my kitchen by the heat source. The room was approx 72 (it’s a big kitchen so it definitely was warmer by our heat source.) I also covered with a dark kitchen towel but I doubt this is needed. I gave it a little nap LOL. Let your dough rise as LONG AS NEEDED to double. If you have a cool house/apt, just know this step might take longer, and that is ok.
- When risen appropriately, make the sweetened cheese and grab your preserves from fridge.
Sweetened Cheese (Do NOT do this in advance. I did and the consistency was not good. I only made it an hour before building the babka, then put in fridge, but the sugar caused the cream cheese to separate. It still tasted great, but it made for a chunky layer of cheese, not a nice smooth and even layer.)
- put cream cheese and sugar in bowl and blend thoroughly with either a hand mixer or spatula.
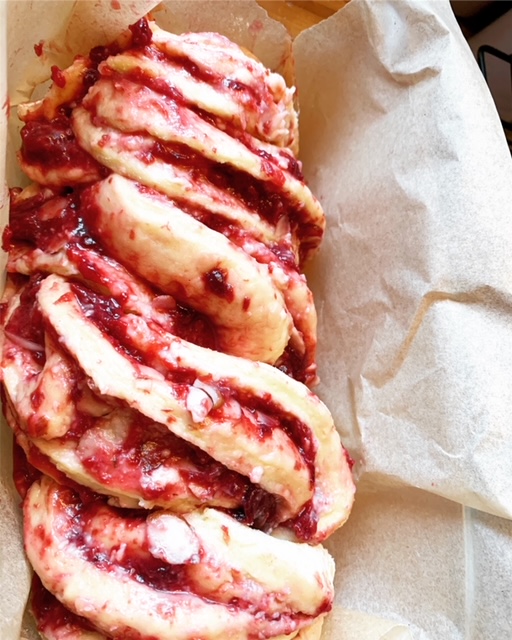
Building Your Babka Loaves (Note: have two load pans prepped with parchment paper and off to the side)
- make sure you have all your items for your babka close at hand! (flour for dusting work surface, preserves, sweetened cheese, spatula, dough in bowl, prepped baking pans.)
- remove plastic wrap, punch down dough and turn out onto lightly floured surface. it will be BUT-TER-RY. Lightly dust top of dough pile with flour then divide in half.
- place one half back into bowl for second loaf.
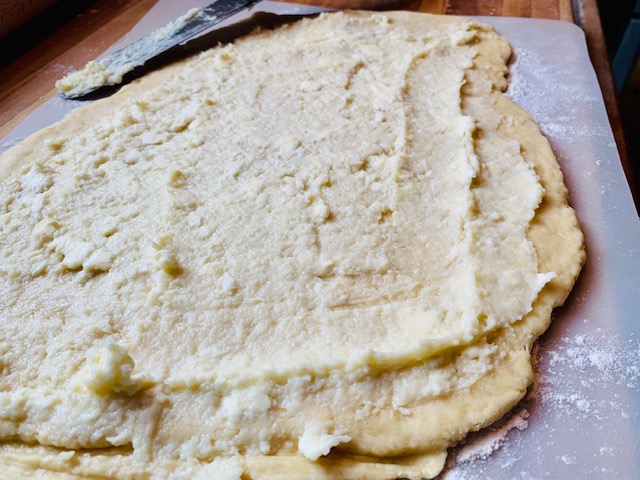
- lightly flour dough on working surface and form into a rectangle.
- with a rolling pin, roll out dough to a rectangle approx 12″x16″
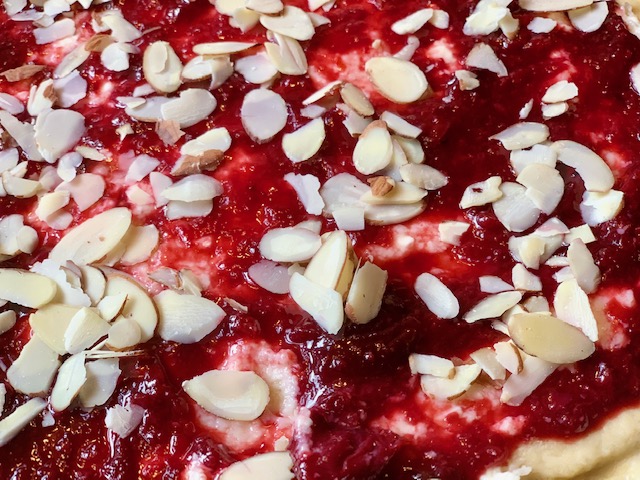
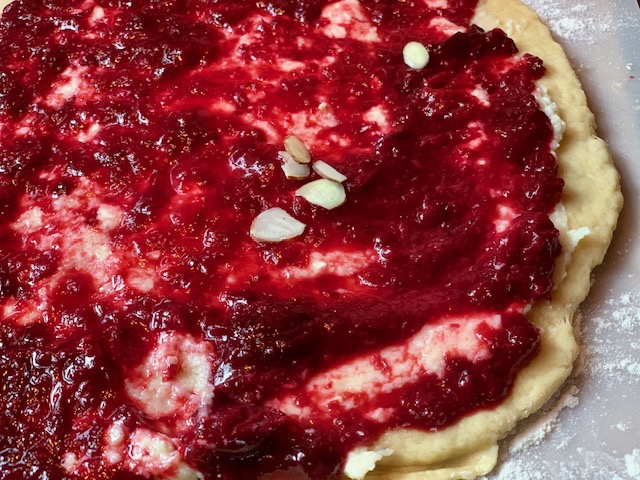
- with spatula, spread 1/2 of sweetened cheese mixture onto dough evenly
- next, spread an even layer of preserves on top of cheese mixture (more or less based on your preference… I used 1/3 of the preserves on each loaf…)
- Here, I chose to add some sliced almonds. I really wanted to see if I could get a cherry cheese danish vibe from this babka… 🙂
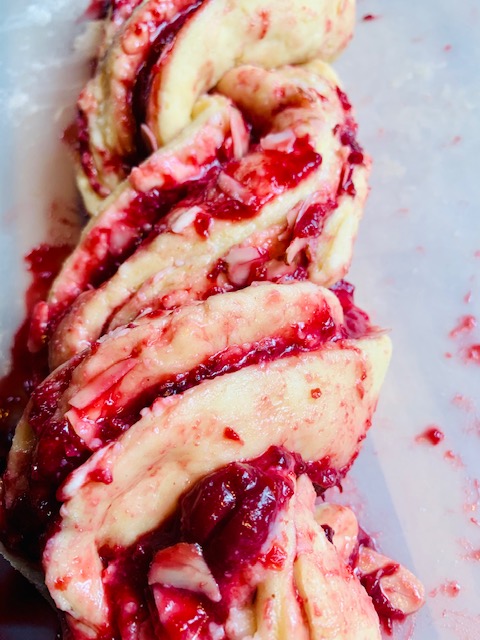
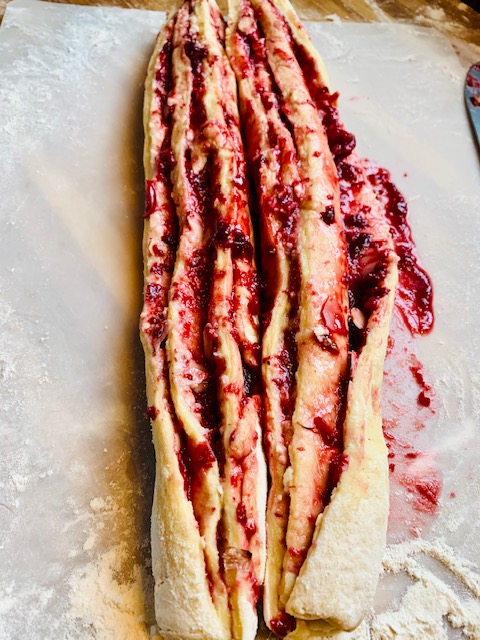
- Roll the dough up along the LONG EDGE. This is where it gets messy, but that is ok. The goal is to not roll too tight, that will push all your fillings out!
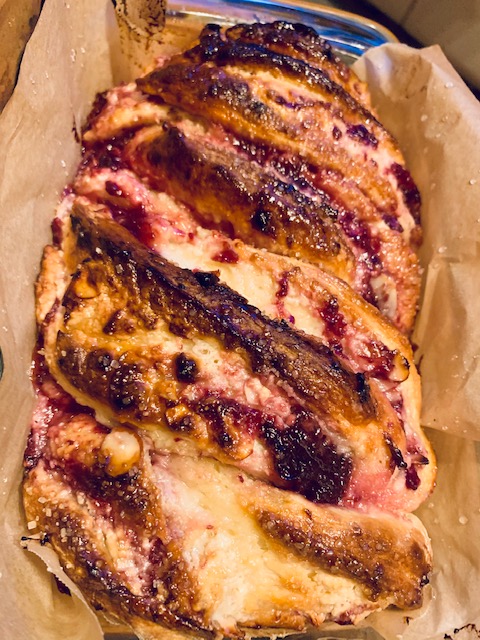
- Once rolled, slice in half the LONG WAY and turn the halves out so you see the layers facing up
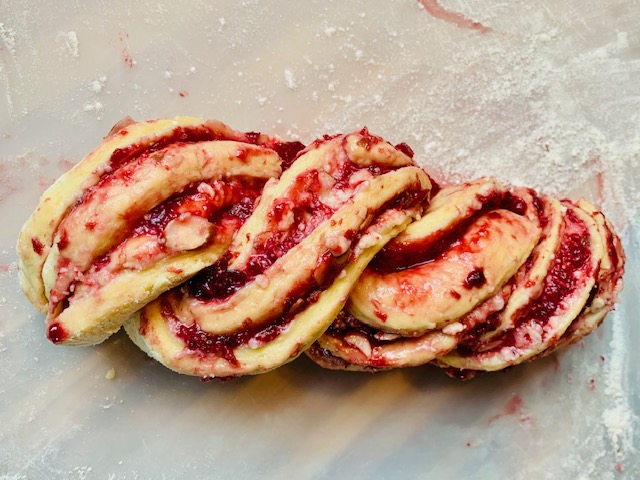
- Next, TWIST the two halves together, folding over the ends to ‘tie’ together. (Another messy step but again, it is OK.) Try not to twist too tight and smoosh out all that awesome filling!
- you will most likely have to squish the twisted ‘loaf’ to fit into your prepped pans. It’s ok. 🙂 All of those layers and twist will be turned into YUMMINESS.
- Clean off your working surface and dry.
- Repeat steps to build second loaf.
- Set prepped loaves in their pans in same warm spot, uncovered, for and hour. This second rise is important to re-expand the dough you just worked and deflated and smooshed.
Baking and Finishing your Babka (You are SOOOOO close!)
- 20-30 minutes before the second rise is done, preheat oven to 350, set rack to middle.
- Once up to temp, place loaves in oven and bake for 30-40 minutes, or until deeply browned (not burnt) on top and a tester comes out clean.
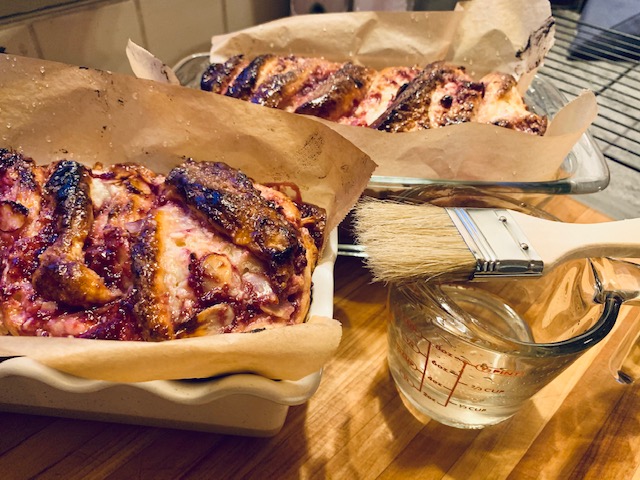
- About 10 minutes before loaves are done baking, make the sugar syrup by combining sugar and hot water into microwave safe dish (I used a pyrex measuring cup) and heat for 20 seconds at a time, stirring between each interval until all sugar is dissolved. Set aside by cooling rack with pastry brush. You will use as soon as the loaves come out of the oven.
- Remove loaves and place on cooling rack in pans.
- Immediately begin brushing the sugar syrup evenly across both loaves while they are still HOT. YOU SHOULD USE ALL THE SYRUP. I didn’t, but wish I had. This is not to just ‘glaze’ the top, but to moisten the loaf and distribute that moisture throughout the bread. It’s a dessert bread, and one you should not skimp on. Lesson learned for me! Use it ALL!
- Allow bread to cool for 30 minutes in their pans (allowing the syrup to be absorbed as well), then using parchment, remove from pan and let cool completely on cooling rack.
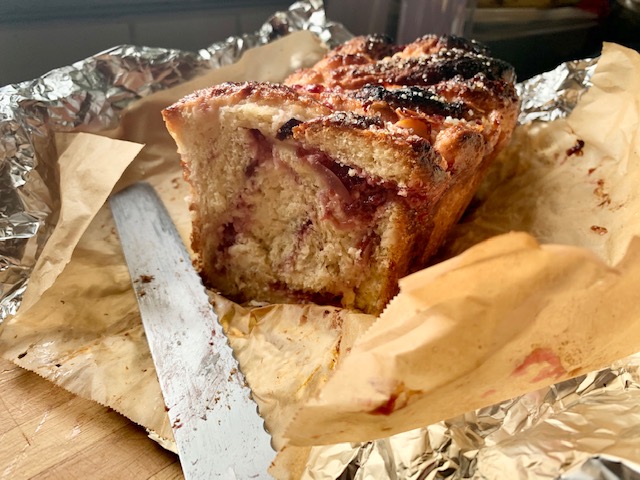
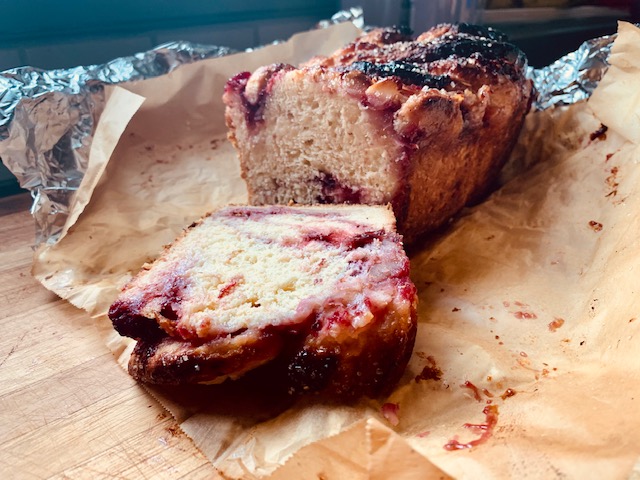
- Slice and enjoy the one you’re eating immediately (gotta test it, right?) To store loaf, wrap in foil and place in fridge.
- Wrap cooled loaf you are freezing in several layers of plastic wrap, then a layer of aluminum foil. Freeze. Eat within 2 months of freeze date. Thaw overnight in fridge.


WHEW!
Yes, this was a challenge. But I truly felt that with all of the ‘quick bread’ recipes out there and the desire to get everything done in the least amount of steps and the shortest amount of time… well, sometimes we folks need to remember that there is peace and mindfulness in taking on a complex challenge.
Using your hands, making something delicious, working your brain to complete a more difficult task… these are reasons we home cooks LOVE being in our kitchens. The joy of making something delicious comes from not just mindlessly gathering the least amount of ingredients, building a recipe with ‘hacks’ and shortcuts, and revealing in how EASY something was. Basic recipes with minimal steps have their place, for sure…. you want fresh bread every week for sandwiches or sides or hell, CROUTONS? Maybe the 5 minute Master recipe is the quick project you want.
But most of the time, we home cooks LOVE the process, the doubt and the elation that comes from a challenge. And we celebrate overcoming that doubt every time we take a bite of our yummy creation. THAT, friends, is positive reinforcement in it’s most base form.
This babka is DELICIOUS.
Did it look like a fail in my eyes almost every step of the way? YES.
Did I mutter swears under my breath A LOT? YES, friends, YES.
Did I leave the challenge more confident and now eager to try another variation, or to make a plain brioche loaf with this killer dough for a special brunch treat for my family? YES.
Embrace the challenge. Revel in the complexity. Doubt yourself. It’s ok. Life is messy, doubt is real and we need to experience it to come out the other side to enjoyment.
Personally, I think a good baking challenge is a great form of mindfulness. It’s one reason I choose to do it.
Got ideas for a great babka combo? I’d love to hear and see what you do with this recipe!
Tools of Note from this recipe:
Stand Mixer OOOH I love my mixer. I might be upgrading soon, but this 5qt is what has gotten me through MANY years of work in the kitchen.

Hand Mixer Yes, we are a KitchenAid home and I have yet to have issue with them!

Stick Blender I have the crazy set with different attachments, etc… but this is the actual blender. From gravies, to jams, to tomato sauces… I use my stick blender a LOT rather than pulling out the massive Ninja.

Loaf Pans I love my decorative pans (I mean, they are SOOOO pretty) but in honesty: my glass loaf pans put out the better loaves.

Cooling Tray A must if you bake a lot. I have several different kinds (tall/stackables and low) but this one should get you through your needs pretty easily!

Happy Baking!

I really love the idea of prepare]ing food with mindfulness in stead of speed.
LikeLike