As a passionate gardener, you aggressively search for ways to improve year over year. That feeling of growing your own, taking back some of that ownership of your food sources or flowers or even beauty products (from oils, salves, soaps…) to the possibilities of finding a new income source through a product you can cultivate and harvest on your own…. the drive to be better each season is STRONG within us who love to work the earth and grow.
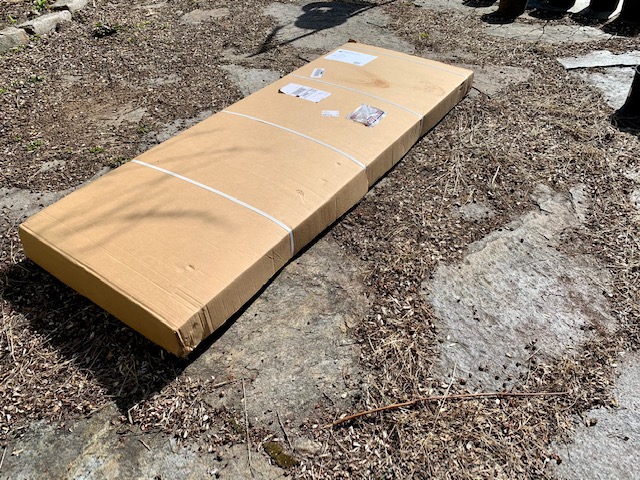
My incredible hubby helped fan this flame a few years ago by buying me a rigid outdoor hobby greenhouse. Then our daughter was born and, well…. it sat in it’s box for the last year and a half.
Life, right?
Well, THIS year… the year I took back some of my life by leaving my job to focus more on family and the life we were trying to build for ourselves… THIS was the year that sucker was getting unboxed and built. This year, I committed, was the year that more of the ‘Project List’ got checked off than added to it.
Project #1: Greenhouse build.
The Palram hobby greenhouses are super easy to find online and they offer many different sizes, styles and accessories to maximize / customize it to your needs. Rather than go HUGE, I like that I’m getting to learn small, and can expand or add a bigger greenhouse depending on how the business model we’re working on takes off.
After many discussions about the smartest place to set it up, we decided that proximity to the house, garden and water was the best option at this point, so I then set out to mark, level the site and build.
As with any structure you are placing on your property, you need to start with level ground. There are several ways that you can accomplish this, but depending on your needs, site and comfort level with power tools, I would suggest just checking out YouTube for some good videos on options. I leveraged a friend to throw some questions and ideas by and it helped me solidify my plan. Some questions to ask yourself are:
- Is this going to be it’s permanent home?
- Am I placing it in an area that is good for it’s purpose, yet not hindering/obstructing anything (aka: water access, maximum light BUT NOT over the sewer access? Or along the line of underground power cables, etc?)
- Can I handle the workload to prep the site or will I need help?
The answers to those 3 questions ultimately decided my site preparation.
- No, this may NOT be it’s permanent home, so pouring concrete was out of the question… I decided on leveling the ground and laying a paver base, and anchoring into the ground.
- The area we chose was south facing, tucked into our garden area and was able to be sited where it would not be in the way should something need to be accessed. As I was not digging DOWN, not pouring concrete nor building a heavy structure (decking) to set it upon, even should there be an issue, it could be picked up and relocated with ease.
- I COULD handle all the site prep and build myself. Many sore muscles later, my finished product brings me even more pride and commitment to get the most of this new addition to my gardening toolkit!
Being a mom of a 16 month old means on most days, M-F, I get about 4-5 hours of work in before needing to take care of the house, dinner prep, any errands and then pick the kiddo up from daycare. So, on ‘Greenhouse Week’, my project time was about 11a-3p give or take.
Monday: site prep.
As nothing is easy in life, our property is on a pretty steep grade. We lose about 12-16″ over 5 feet. This required me to leverage leftover garden soil from our potato boxes which got me to 99% level (YAY!) I marked out an area that was 6-12″ larger than the base of the greenhouse and got to work.
After the site was level, it was time to get the remaining materials needed for finish the site and begin to build. I headed to Lowes and went through my list:
- 6- bags of Step 1 paver Base
- 5- bags of Step 2 paver Base
- 5- bags of Drainage Rock
- 8- 12″x12″ pavers (I chose red to try to retain heat with a darker color)
- 2- decorative paver stepping stones
- 4 shelf shelving unit
Once home and unloaded, I grabbed my tools to finish the site: a 10″ square tamper, level and metal garden rake.
Laying the paver base down in order, lay and level the Step 1, then tamp. Then lay and level your Step 2 and tamp.
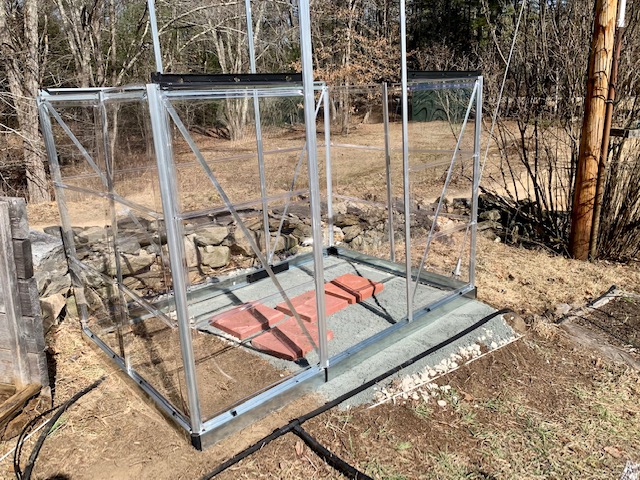
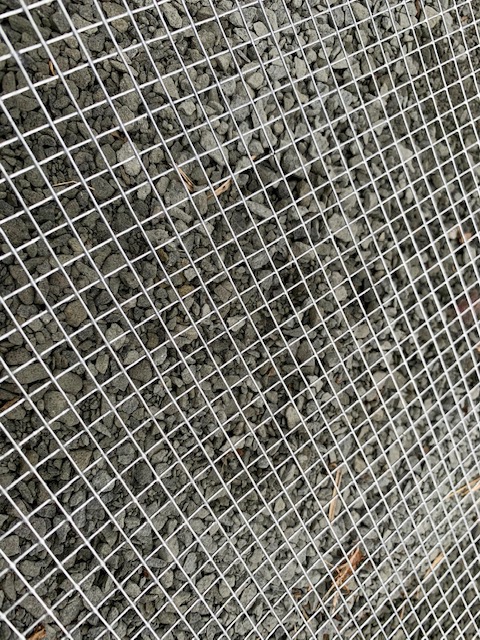
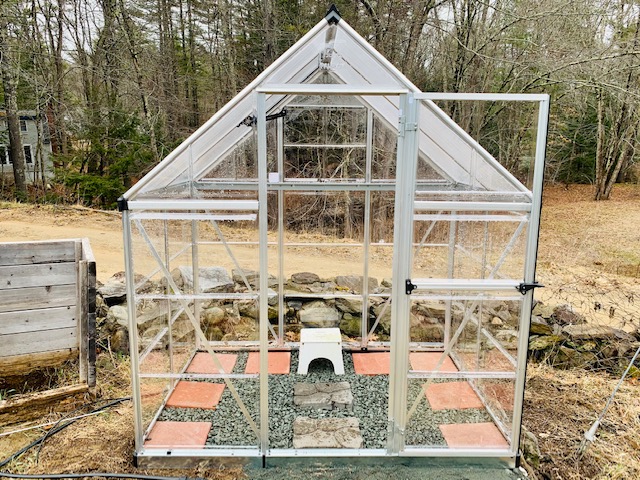
At this point, I chose to build the greenhouse and finish off the floor once I had the structure completed so I could anchor it , lay the hardware cloth (we have tons of pesky critters, chipmunks, squirrels, rats, groundhogs… UGH… yay farm life!) then place the paver stones THEN lay the drainage rock.


Tuesday: unbox and sort the parts, read the instruction manual (only visual aids… no language walking you through it, so it required close attention to detail) and then beginning to build. Starting at about 11am, I had the main structure and walls up on the site by 3pm with only the roof, roof vent/window and door to build the following day. I highly recommend if you are building a kit house, to get some tight fitting work gloves. All mine are bulky and there’s so much fine motor skill moments needed for this (handling small screw and threading nuts, etc) that I just ditched them and went barehanded. My hands are a bit tore up now but, alas – FARMLIFE. LOL


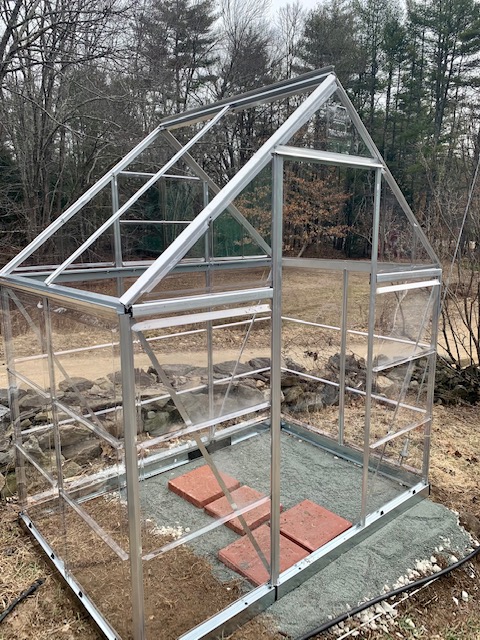
Wednesday: finish off the roof, build and install vent/window, build and install door. The hardest part of the entire build was the dang door. Just an FYI. This took me close to the same amount of time as building the main structure. All said, the structure was complete by 3pm. Floor finishing was set for the next day. I had a bit of extra time, so took an hour to test out my idea for the raised garden bed enclosures… (this is going to be another post… I vow to protect the garden from both turtle nesting and groundhogs this year!)

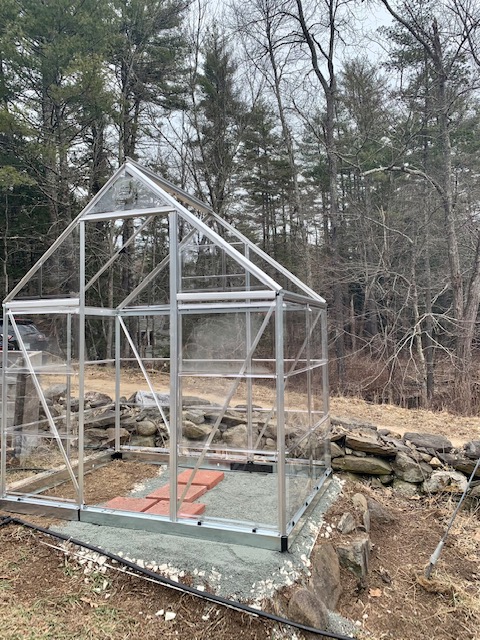
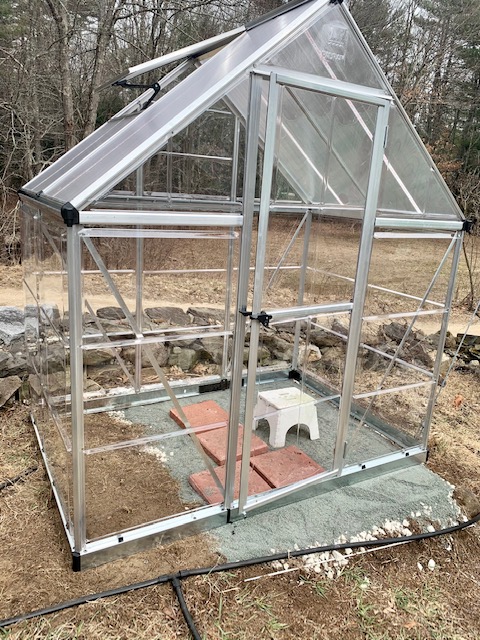


Thursday: Anchored, laid hardware cloth, set pavers and filled in with drainage rock by 2p. Build shelving unit and was in the Adirondack chair reviewing Friday’s plans by 3pm.


I also purchased some extra goodies for it which arrive soon: trellis/hanging clips and low proper greenhouse shelving. I purchased one shelving unit from Lowes (it fit the dimensions I needed to get it up and running this weekend) as well as a small folding worktable that will live in there.
All said, it was a productive few days of work which I firmly believe will improve the garden this year and for many years to come. I will use it as a grow out space… a place to harden off seedlings as well as quick start some annuals without needing to take space in the indoor greenhouse!
LINKS:
Here are some of the items I used (my site is part of several affiliate programs, which may bring me a small commission on purchases made through the links below… at no additional cost to you. This meager commission helps me offset the costs of doing the things I love as well as helping me create content and inspiration for you to do the same!)
Palram Hobby Greenhouse:

Paver Bases and Stones: Step 1, Step 2, Drainage Rock, Red Pavers, Stepping Stones
Outdoor, wireless temperature and humidity sensor
4 Shelf shelving unit, black (to help retain heat)
Activity Table (sooooo many activities!)
Arriving in a few days:
Palram hanger/trellis brackets:

Greenhouse shelves w/potting station:

